Saturday, May 30, 2015

Golden Dreams and a Dragonfly


It's been a while since I posted a photograph worked up with layers in PSE.  And I thought it was about time I actually DID something with these textures I've been creating ...  Hence this Golden Dreams Dragonfly was born on a rainy Saturday afternoon!


Layer 1)  I started with one of the gelatine print textures from last week.
I call this one Golden Dreams.   I doctored up the upper right corner before I set to work with the rest. 
Layer 2) Swirling Snowflake Brush by Linda Nelson at Pixel Berry Pie  in the corners - Overlay Blend Mode at  67% opacity
Layer 3) Dragonfly Brush (my own!) - Soft Light 100%

Although there are some free dragonfly brushes out there, they were too small to fill the space I needed, so I made my own from this picture of a real life specimen who happened into my vicinity a few years ago.   I'm really happy with the way it turned out!

Layer 4) Copy Layer 3 - Soft Light 80%
Layer 5)  Obsidian Dawn Swirl Brushes in the corners - Soft Light 100% (added last)
Layer 6) Text : Dream- Change-Joy - Zapfino Font - Overlay 65%
I looked up the symbolic meaning of Dragonfly, and these were some of the key ideas.  How's that for a positive spin on change?  After some input from a thoughtful friend in Sweden, I changed the words a bit to the modified version at the top of this post.  The original words were : Dream, Joy, Change.  I thought Dream-Imagine-Create elevated this piece even higher.   Here's the first version :


Layer 7) Color Fill Frame (a la Kim Klassen) - black - Soft Light 65%

Sharing with The Texture Artist's Facebook Group
Sharing with Texture Artists FaceBook Group.

Friday, May 29, 2015

Waste-Not Want-Not Gelatine Plate Prints


I don't like to waste anything -- especially extra paint or dye after a mess-making session.  In this case, I used old Library catalog cards (Hey--I have 'em 'cause I'm a Librarian-by-day and I kept 'em long after we moved everything online because they have so many uses!) to use up the paint left on the gelatine plate after I pulled the larger 8-1/2 x 11 in prints in this post.

I love the way these turned out!  Every night this week, I go out to my studio and flip through the cards -- pretty colors and textures.  So pleasing!

Take a look at some of my favorites from the set :


 These two are what are known as "ghost prints."
I was just playing ...  Can't wait to pick up some Gingko leaves.


Just to prove these are really and truly old library catalog cards.  


  Here's the whole entire set as a collage. 

2LO Texture-Making Class : Gelatin Plate MonoPrints


Continuing with 2 Lil' Owls online texture-making class, this time with mono prints off of a gelatin (Gelli) plate.    I actually made my own gelatine plate with glycerine and good ol' Knox gelatin.  Simple and affordable ingredients.  The brand name Gelli plate is a little pricey--I didn't want to invest $30 only to use it once.  And the gelatine-only plates are a bit too delicate and not long-lasting enough--and I don't want it to take up space in the fridge.  With the DIY model, it's a smaller investment, long-lasting--and I think it works just as well.

 Gelli Printing with Found Objects video 

There are also a multitude of Gelli printing tutorials on Pinterest to explore.  So many possibilities!

[Idaho Beauty--I would recommend you give this a try.  The gelatine plate has a lot more "give" than glass or other hard printing surfaces, and it's amazing how the paint is lifted off the pad with the print paper. ] 

All told, I pulled about 25 8-1/2 x 11 inch prints that day.   I won't bore you with all of them, just a few of my favorites.  Enjoy!  ;-)

Here are the results of my gelatine plate Play Date :

This was the first one I pulled off the plate.    
Good enough to keep going to try more ... 

After that I mixed in other colors -- like Black since I still had India Ink fresh in my mind.  
I love how there are traces of the last pull on this one ...

Then on to purple and gold metallic paint.  Mmmhh!


Some of them even came out like watercolors -- This was aided by the fact that I sprayed some water on the plate to help any residual paint lift off onto the next print.   I like this effect, too!


The Gelli Prints video above showed this technique.  It will take some practice to make it look part of a well-planned composition.  But for now, it was fun to just try it and see how things come out ...

Denise is right!  Even the "junk" pages you use to unload your brayers can come out pretty, too!  These make interesting abstract pieces, too, with a transparent quality -- like glass suncatchers.

Here are the prettiest pages I used to unload the brayers :


Saturday, May 23, 2015

2LO Texture-Making Class : Distressed Stains


This one has a dry-brushed look.

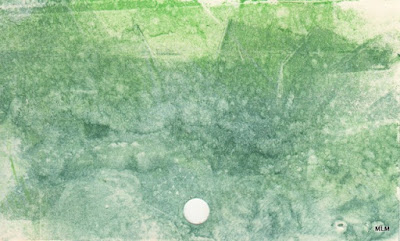
Continuing with Denise Love's Texture-Making Class at 2 Lil Owls.   I have been most interested in this technique with Ranger's Distress Stains.  I stocked up on the stains during a 40%-off sale at Joann's a few weeks ago.   I also had a variety of Starburst Stains from a class a few years ago, realizing they should work brilliantly on paper where as they were blah on fabric.   Now that I understand the technique, I can make some of my own textures with them. 

After the brilliance, vibrancy , and depth of the alcohol inks last week, I found it hard to shift gears with this new medium--even though I was looking forward to getting started.  I had such high expectations after the alcohol inks, these stained textures seemed to be a little meh in comparison.  Of course, it's not really fair to compare them.  This is a whole new medium with different techniques and different results.   (Just to check--the Yupo paper is a waste of time with these stains.)

Although I had watched the class video a few weeks ago, I thought I knew what to do and dug in ...  Mine were not coming out like Denise's though.  Turns out, I had not remembered to spray the watercolor paper to wet it down before pulling the print--nor was I using the heat tool to dry them quickly.   It makes a difference with wet paper vs. dry, and in letting them dry in their own time.  In some ways this is similar to the watercolor techniques that we started with.

I am also grateful for the scanner I have -- These actually look better (to my eyes) after being scanned and digitized that they do in real life.  There are layers and depths that my eyes seem to be missing in real life.  The only touch-ups these have had in digital is some slight cropping or straightening on just a few of the images. 

Apologies for this very looonnnggg post.  Too many delicious textures to leave out (and I did leave out a few).  Enjoy the eye candy!


 Black Soot and deep purple with the silver metallic.  
This one is hard to see in real life, but scanned beautifully!


 I think I was going for tree bark with this one.


 Red, black and silver.


 For these, I'd watched some additional videos on Distress Stains and learned that they reacted with water even after they were dry.   So this one has water dripped on it.


 These two kind of look like Amazonian rain forests from above.


 More tree bark.


Mmmmmmh!

Still haven't seen enough?  Denise Love has a couple of gorgeous collections in her 2 Lil Owls Shop that are based on these Distressed Stains.  They are absolutely breathtaking!  Go see :

Rendevous and Captivate are two of Denise Love's collections for sale, if you are so inclined.