This blog records my experiments and successes with fabric and fibers, surface design, stitching, weaving, photography and whatever else strikes my fancy. Enjoy ...
Starting a new pair of socks on the knitting looms. Working both socks at the same time improves the likelihood that I'll actually finish them.
Purple Rain gradient yarn.
The Purple Rain gradient yarn was dyed back in April 2019 after watching a video from ChemKnits. Pretty stuff!
These loom knit socks always start with the Kitchener stitch for a seamless join under the ball of the foot. It gives sort of a "woven" feel to the beginning.
Since it was dyed originally with a knitted blank, I was wondering how the colors would behave when re-knit into a sock. It's a more solid color texture than I'm used to with the ball-dyed yarn (which I absolutely love!).
Here's the inside of the sock as it is knitting up. Kind of like purple iris pointalism.
The purls are on the inside of the sock, making them nice and bouncy / cushy.
I am using hand-dyed Chic Sheep 100% merino wool yarn.
Since I'm away from home at the moment, I don't have my hand-cranked ball winder for yarn. So I had to ball it by hand. Jut thought you might want to see what the ball looks like.
I finished this pair of "Red Barn" socks for my Dad, mostly during time spent in vigil with my mom's failing health the past 5 months. At those times, I like to make something of comfort to support the spouse who is losing their dearly beloved (in this case, my Dad). It gives my hands something to do, too, when I can't concentrate on reading.
One Christmas a few years ago, I'd given him a really nice pair of (purchased) wool socks. He loved them! Which is why I knew he would appreciate a pair that I made for him, too.
When I asked my dad what color socks he wanted, without missing a beat, he said RED. All righty, then. Remember those balls of yarns I dyed multiple times with multiple reds until I got something I liked. That was it! All those layers of different reds brought a nice depth and luster to the final yarn. I love it now! Makes me want to dye up a few more balls of yarn.
They knitted up to be a fine and sturdy pair of socks. And the color really does remind me of red barns on the Wisconsin rural landscape.
Kitchener Cast-on (I like this because it feels like weaving, and leaves a seamless join on the bottom of the foot.)
Work the toe box with with 10 decreases / increases
Then start working in the round for 80 rows (This was a little long for him. 70-75 might have been enough.)
Work the heel with 12 decreases / increases on the opposite half of the toe
Work in the round 60 rows for leg (a little longer for boots)
For Ribbed Cuff: 30 rows of 2 Knit and 2 Purl
Super Stretchy Bind off.
I used up as much of both balls of yarn as I could, as he wanted a higher leg so he could wear it in boots.
I finally got smart about marking the pegs so that I would knit and purl on the right pegs for the ribbing on the cuff. That worked out very well. Then I can just knit on autopilot and not have to think purling when I should be knitting.
"I want to do with you what Spring does to cherry trees."
-- Pablo Neruda
"Let blessings fall like blossoms all around you."
-- Rumi
This is the Spring Blossoms wall quilt pattern by Toni Whitney. I've had this kit for probably close to 10 years, and finally put it together this spring. I suspect it's in honor and the absence of the 2 lovely old crab apple trees we has to cut down last fall.
Here is it BEFORE I decided to dive in and do the stitching this afternoon. Already, it's a work of art that I could frame and finish with out stitches, but I don't think I want it to be hidden under glass, suffocating. A quilt needs to breathe, to be flexible and supple. ;-)
Here is the palette of threads I used for the top-stitching / thread painting with a size 14 top-stitching needle and the free-motion embroidery foot. Not as many thread colors as you might expect with the variegated threads to add more colors. One of them is a pink and blue variegation -- which works because one of the pale fabrics in the flowers is a very pale lilac. I didn't have one that was just pale pinks. The stitching idnt take nearly as long as I thought it would -- 1 petal at a time, and it was done!
This afternoon, I added those golden threads for stamens. Kind of fun when I started doing the free-motion stitching. I used 2 golden threads.
Thread painting from the back side. This way, you get a better idea of just how much thread goes into some of the embellishments.
I don't always take time to make a "real" quilt label when I finish a quilt, but I do at least add a tag with the required info, so that when I do get around to making a batch of quilt labels, I know what to write on them.
And the hanging pocket. In this case, 2 6-1/2 in. squares folded in half to create triangles sewn into the corners where a flat stick can be nestled for hanging. I also added a string that acts like a picture wire for hanging. This way the stick just keeps the quilt flat.
This is the pattern, which I purchased as a kit (with the fabric) direct from Toni Whitney, the artist. She even autographed it for me. ;-)
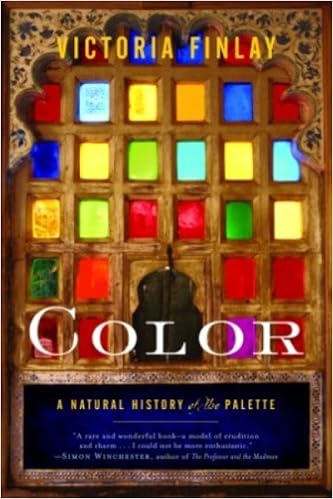
I started reading a new (to me) book called Color: A Natural History of the Pallette by Victoria Finlay. It's filled with wonderful stories and the history of colors used by artists through the ages, and how those innovations in color changed art.
Color #1 is Ochre. It's never been my favorite color-- also known in my world as "baby-shit-brown." But sometimes that's just the neutral color you need in a piece to bring it all together.
Take the complex cloth at the top of this post. I dyed that many years ago, and NEVER liked that awful color. To my eye, it looked like dirty cleaning rags. What would I ever use that horrible color in? Give me a bright and bold batik any day over that boring and blah failure of a fabric.
But the thing about complex cloth is that it has many layers ... and that ocher background worked remarkably well for the "ornaments" I stamped over the top. I used a metal trivet as a stamp. The different colors make them move forward and recede as if it were 3-dimensional.
I'm still not quite sure how to finish this piece off -- What's next?
Grapefruit-Rosemary, Orange, and Lemon cleaning vinegars.
When the pandemic started, people bought out all cleaning supplies. So the have-nots among us (I had some cleaning supplies--don't get me wrong) were left to make our own DIY hand sanitizers and cleaning vinegar. Hurray for Pinterest! And thanks to this post on 5 Scented Vinegar Cleaners at Compost and Canva for her post with pointers and scent mixes to try (and some to avoid).
I've been using a vinegar and Dawn recipe for shower spray that works remarkably well, so why not try some fruit-scented vinegar? The citrus rinds and peels were only going to wind up on the compost anyway.
I made several batches of cleaning vinegar by soaking citrus peels for about 2 weeks to make a concentrate. When they are good and ready, you strain out the solids, cut it by half with water, put them in a glass spray bottle, and you are ready to clean!
They smell so good, you could use them for aromatherapy, too! At least once a day, I like to check and see how they are doing. They don't really smell like vinegar at all.
Grapefruit and Rosemary.
Lemon (pictured) and Orange are the standards.
Pear and Cardamon is still macerating. It smells so good!
I haven't tried pine or cedar yet ... I ran out of glass spray bottles.
And my other herbs have not started for the season yet.
Auditioning the layout of blocks for final placement.
The last quilt top is still hanging underneath it. Looks like that particular orange-y rusty border would also work well on this one. I'll have to see if I have any left to make a border for this one, too.
Too many balls in the air. I just happened to come across this video by Just Get It Done Quilts on Pinterest, and thought it would be a good, quick way to burn through some of the fabric in my stash that I'm tired of looking at.
She calls it The Ugly Quilt Pattern. But that begs the question: Why bother with an ugly quilt if it's a waste of time and money? She explained that the Ugly Quilt is the one that winds up going to the hospital with her family members to offer comfort. It has a very important job, and it soaks up life experiences just by being there in someone's time of need.
So I chose 20 fabrics (10 lights, 10 darks) and followed the directions. None of these fabrics are ugly, per say -- except maybe that rooster fabric. I ironed them and cut them to a standard 14 inch square (a few needed to be pieced to make it the minimum 14 inch size).
Stack - Cut - Sew - Shuffle - Repeat
Somehow the shuffle directions didn't quite work for me, I was not ending up with a nice mix, so I had to do some additional shuffling. And I ended up with an extra block that was kind of confused -- half dark and light and not in the appropriate quarters. That one is left out for now-- a true orphan block.
Basically, you're making a wonky 9-patch with a finished block size of 12-1/2 inches after they get trimmed. The blocks came together in an afternoon--lightning fast-- making me think this would be a good Quilt Retreat project some October to come, if the Covid-19 Pandemic ever ends. Or if my mom ever wants to quilt again ... It's a fast quilt to make.
This is one of the blocks in isolation.
See -- It's just a wonky 9-Patch.
Here's another sample block in isolation.
This is a shot on the design wall from the other side of the room.
I can't get far enough away from it to get a straight-on view.
I still need to square up the blocks and settle on final placement before stitching the whole top together.


 These loom knit socks always start with the Kitchener stitch for a seamless join under the ball of the foot. It gives sort of a "woven" feel to the beginning.

 Since I'm away from home at the moment, I don't have my hand-cranked ball winder for yarn. So I had to ball it by hand. Jut thought you might want to see what the ball looks like.