This blog records my experiments and successes with fabric and fibers, surface design, stitching, weaving, photography and whatever else strikes my fancy. Enjoy ...
Saturday, August 30, 2008
When the Student is Ready, the Teacher will Appear!
This is a picture of the 2nd piece done on my little table loom. I used a black warp cotton thread with a soft acrylic yarn for weft. The weaving is easy--It's the warping that can be a bigger challenge!
Last month, I brought my little table loom to my Art Quilt / Fiber Arts Group. There was a new person there who actually has a degree in Fiber Arts from a school in North Carolina. She has a floor loom and showed us some of her beautiful pieces. One combined loosely woven wool with cool glass beads for bling. It was beautiful! In the 3-4 years I've been a member of this group, I've never known anyone else to weave there ... The timing is PERFECT!
What's more--She has Newfie dog! My own Maggie is a Newfie-mix (we think). The wool from this dog is softer than Merino. Lynda has been felting it with other fibers.
This weekend, I went to visit her at home to see her floor loom (which is not portable). To watch someone operate a large loom like this is like watching someone play a pipe organ with all the pedals and parts. So many strings to keep track of! And she does it!
She was also very encouraging about what I'll be able to do on my little table loom. There are many possibilities. I look forward to more projects on it, and to working with Lynda.
Monday, August 25, 2008
Inspiration for Sky Dyes
A few years ago, I came across the Hubble Site Nebula Gallery. This site has long offered me inspiration on what I'd like to do with surface design. Take a look--there are some GORGEOUS pictures there!
Now that' I've taken Mickey Lawler's class, I think I have a better idea on how to get there ... At least I'm not afraid to mix colors anymore!
Sunday, August 24, 2008
Watermelon Post Card
2 Aurora Post Cards
Monday, August 18, 2008
Day 3 (of 3) : Sky Dyes Workshop with Mickey Lawler
Day 2 (of 3) : Fabric Painting Workshop with Mickey Lawler
Flower Garden
Detail of Flower Garden (Specks are from salt sprinkled on wet paint)
This was the "sop cloth" laid under the garden piece above. It's a nice piece on it's own!
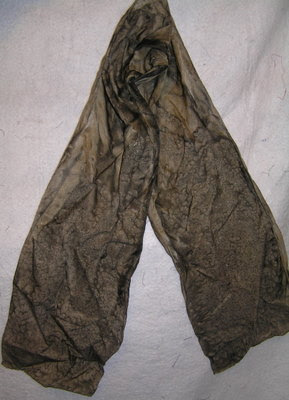
Silk Scarf that had been "herb dyed" a few years ago. It needed a little more work.
Overpainted with Black and Gold Setacolor, sprinkled with salt. It is much more interesting now!
Detail of Silk Scarf
We also tried overpainting white-on-white fabric. The white print on the cloth acts as a resist.
Water
The best thing about this 3-day workshop was all the practice in mixing colors. That has been the single thing preventing me from getting started on this at home. I've had the book and a set of the basic paints for about 3 years now. Now I know what to do with them! There is no measuring--you just mix a little of this and a little of that until you get a color you like. It's very free-form and liberating!
Saturday, August 16, 2008
Day 1 (of 3) : Fabric Painting Workshop with Mickey Lawler
This weekend, I'm doing a 3-day workshop with Mickey Lawler of Sky Dyes. The Workshop is sponsored by The Darting Needles Quilt Guild in Appleton, WI. I've had her book and the paints for about 3 years now, but haven't done any of the projects until today!
Sun Printing with shredded cheesecloth and feathers.
Detail of Sunprinting
Stormy Sky
Night Sky
Sunset
Blue Skies (Not a great photo, but this is my favorite piece of the day.)
Scrunched Fabrics.
We're using Pebeo Setacolor Textile Paints. They need to develop in the sun in order to maintain depth and brilliance. Good thing we had a bright sunny day!
Sunday, August 10, 2008
Rust Dyeing Experiments
Inspired by Purple Missus's fantastic rust-dyeing results (here, here, here, here, and here), I wanted to try this. Stay a while on Lynda's blog--she does some wonderful work with textures and color!
So I mixed up a pan of caustic tea (3 liters hot water with 50 tea bags) and 1 pan of iron water (250 grams iron mix with 3 liters warm water).
Note on the iron : I was not able to find Ferrous Sulphate (a plant fertilizer) locally. So I bought some "fast-acting iron" at Menards. It's got a few other things in it--like urea and pot-ash. But since these are familiar dyer's ingredients, I decided to give it a try. Here's the bag and the content mix :
After a few hours, both pans looked remarkably like the tea. I dipped the fabrics as described by Purple Missus. My fabrics wound up looking tea-stained rather than rust-stained. I hung them up to dry and oxidize for a week. Even after a week, they still seemed disappointing--more like old dirty rags than anything I'd want to use in a quilt. They looked a little better when I brought them upstairs for pictures ...
On Round 2, I ordered some Iron Sulphate from a garden center out west. No one in my area carries it--we have plenty of naturally-occurring iron in The Rust Belt. What arrived in the package was Bonide Root Rot Stopper. Hmmmh ... they shipped the wrong item. Fate made me wait again. It was another week before the right stuff came. Here's the iron sulphate :
Obviously, there is a difference in the content of the mixtures. I thought perhaps that was the difference in the results I got vs. Purple Missus gorgeous colors. Nope--there's something else going on ... maybe with additives in my local water supply?
Here's what I got with Round 1 (with the Fast Acting Iron mix) before washing :
Here's what I got on Round 2 with the actual Iron Sulphate :
This one was Lois Jarvis' storm clouds method with bits of tea sprinkled on the fabric along with the iron. This is dramatic, and could warrant more experimenting ... Maybe if I ground up the iron into a dust or powder rather than using the pellets? Lois Jarvis explains it in this interview with Bonnie McCaffery. I actually purchased one of her scarves in April.
These actually look better in the pictures than they do in real life. These are the more interesting ones. Most of the Round 2 fabs came out looking like old rags that ought to be retired.
Maybe I'll just put these away for a while. They might look better to me in a few months ...
Here's another thought --if it's iron I need for this project, why not use Blood Meal?
All this experimenting--some with disappointing results--makes me realize that I may be squandering my time and effort away on all these other sidelines. It takes time away from what I am good at--Art Quilts. Ah, but summer is supposed to be too hot to be in the sewing room. Summer is the time to retreat to the cool basement.
At that point, here are my options :
1) Ask Purple Missus for a sample of her dreamy results
2) Ask Lois Jarvis (of Rust-Tex) where to get the iron powder
3) Order Lois's CD and learn to do it for Midwest conditions. I know she has meticulously researched this, and has only methods for reproduce-able results on her CD
4) Give up on Rust-dyeing altogether
5) Continue to experiment - Over-dye these with more rust or Pro-Chem dyes
So I mixed up a pan of caustic tea (3 liters hot water with 50 tea bags) and 1 pan of iron water (250 grams iron mix with 3 liters warm water).
Note on the iron : I was not able to find Ferrous Sulphate (a plant fertilizer) locally. So I bought some "fast-acting iron" at Menards. It's got a few other things in it--like urea and pot-ash. But since these are familiar dyer's ingredients, I decided to give it a try. Here's the bag and the content mix :
After a few hours, both pans looked remarkably like the tea. I dipped the fabrics as described by Purple Missus. My fabrics wound up looking tea-stained rather than rust-stained. I hung them up to dry and oxidize for a week. Even after a week, they still seemed disappointing--more like old dirty rags than anything I'd want to use in a quilt. They looked a little better when I brought them upstairs for pictures ...
On Round 2, I ordered some Iron Sulphate from a garden center out west. No one in my area carries it--we have plenty of naturally-occurring iron in The Rust Belt. What arrived in the package was Bonide Root Rot Stopper. Hmmmh ... they shipped the wrong item. Fate made me wait again. It was another week before the right stuff came. Here's the iron sulphate :
Obviously, there is a difference in the content of the mixtures. I thought perhaps that was the difference in the results I got vs. Purple Missus gorgeous colors. Nope--there's something else going on ... maybe with additives in my local water supply?
Here's what I got with Round 1 (with the Fast Acting Iron mix) before washing :
Here's what I got on Round 2 with the actual Iron Sulphate :
This one was Lois Jarvis' storm clouds method with bits of tea sprinkled on the fabric along with the iron. This is dramatic, and could warrant more experimenting ... Maybe if I ground up the iron into a dust or powder rather than using the pellets? Lois Jarvis explains it in this interview with Bonnie McCaffery. I actually purchased one of her scarves in April.
These actually look better in the pictures than they do in real life. These are the more interesting ones. Most of the Round 2 fabs came out looking like old rags that ought to be retired.
Maybe I'll just put these away for a while. They might look better to me in a few months ...
Here's another thought --if it's iron I need for this project, why not use Blood Meal?
All this experimenting--some with disappointing results--makes me realize that I may be squandering my time and effort away on all these other sidelines. It takes time away from what I am good at--Art Quilts. Ah, but summer is supposed to be too hot to be in the sewing room. Summer is the time to retreat to the cool basement.
At that point, here are my options :
1) Ask Purple Missus for a sample of her dreamy results
2) Ask Lois Jarvis (of Rust-Tex) where to get the iron powder
3) Order Lois's CD and learn to do it for Midwest conditions. I know she has meticulously researched this, and has only methods for reproduce-able results on her CD
4) Give up on Rust-dyeing altogether
5) Continue to experiment - Over-dye these with more rust or Pro-Chem dyes
Subscribe to:
Posts (Atom)