Sunday, June 14, 2009

Little Gardener is Complete!


I finished the Little Gardener Quilt started in March at the Wendy Bulter Berns Workshop.
Quilted the background and bound it this afternoon.


I spent a long time trying to figure out the best way to thread paint her face in order to make it look three-dimensional. This is what I came up with.
The thread-painting is done before the top is layered with batting and backing. So the face piece has stitching, but it puffs up from the quilt.


Same thing with her arm. Again, the thread-painting is done before the quilting, so it puffs up from the background.


Here is one of the heavily thread-painted flowers, along with the edge treatment : a little fancy yarn at the binding edge. I laid it on to test it, and it really did seem to be missing something when I pulled it away.

Feels good to have another project done!

New Books on Free Motion Quilting Patterns


I bought Sally Terry's Hooked on Feathers book.
At the FVTC Sewing Expo in March, Renee Shedivy (who first taught me to do free-motion quilting) was raving about this book. This past weekend, the local quilt shop invited Sally Terry to Oshkosh for a weekend of workshops. I was unable to attend, but I heard it was a blast!

Sally Terry is a long-arm quilter, but these patterns could easily be adapted for a regular standard size sewing machine without a quilt frame. The beauty of her feathers is that they are free-form. No tracing them out for hours beforehand. You just do it! And they look fabulous!


I also bought Dijanne Ceval's 72 More Ways not to Stipple or Meander.
Tip : She lives in Australia, so you might want to order the CD to save on shipping, then print and bind it locally. While you're at it, order the first CD/Book : 72 Ways Not to Stipple or Meander. More great ideas for free-motion quilt backgrounds.

I admit it, I get bored to pieces with stippling and meandering. So I'm always looking for other ideas. This CD/Book is packed with them.

Peas-in-a-Pod Post Cards

In PA last week, pea pods were in season in my father-in-law's garden.
We ate all the pea pods he brought up from the garden.


Version 1 is done with a reverse applique technique.
I layered a pull "page" of the green over-top the background.
On top of that, the outlines of the peapods were drawn on quilt paper (like tracing paper).
Then I stitched through it all, followung the outlines.
Tore off the quilting paper, and picked the bits that remained.
Then I cut away the green to the edge of the pea pods.

Quilting paper has become my favorite way to mark fabric for quilting.


Here;s version 2 done with fusible applique.
The end result doesn't seem all that different, proving there's more than one way to "skin a cat."
Here I used a different color green for the inner pea pod walls. I didn't bother to reverse the design, so it's a mirror image of the one above.
This method is more familiar to me, but sometimes I worry about the longevity of the fusibles. Will it turn yellow as it ages?
This method is easy and flexible, but may not be advised for heirloom pieces--or that great piece I'll want to have hanging in the Smithsonian someday ;-)

Tuesday, June 02, 2009

Chickadee


Here's the full quiltie (again, it's square ; my design wall is warped.) This was a class project from a few years ago in threadpainting. The teacher was a painter, so she had a wonderful sense of color and how to mix the threads to get the desired effects. You can see an example of the pine bow behind the bird.

This was also quite an exercise in marking and quilting the quilt.
* The background was echo-quilted freehand with clear thread (no marking needed).
* The pinecones and acorns in the corners were drawn on quilting paper, pinned to the quilt, and stitched through. Afterwards, I pulled the paper off. The stitching perforates the paper so it comes off pretty easily. This is a great technique where precision is needed. See a little more about the technique here.
* On the borders, I used a sliver of soap to and a ruler to mark the grids. The great part about using soap to mark is that is comes off with just a spritz of water. (Lever 2000 is a great one to use as it's hard. And it comes in blue and white.)

Monday, June 01, 2009

Maple Sap Soap


Last weekend, I was able to make 2 batches of soap, now that the wet studio is in better shape to allow working on new projects. I used a strong tea (Tazo Passion Fruit and Honey Bush Peach) made with Maple Sap, instead of plain water. As with the goat-milk and honey soaps, I'm hoping the sugars in the sap will carmelize in the saponification process. I'm not sure how much of the tea scent (I didn't use any fragrance or essential oils) will be left at the end of the curing process, but it sure smelled good in the making! This batch will be ready in another 5 weeks.

A few years ago, I went to a craft show and purchased soap from a remarkable soap-maker at Century Farmhouse. Her soaps had unusual combinations of scents and ingredients. The scents were not over-powering, just really pleasant ... I bought a bar of her maple sap and walnut soap--and I've been savoring it ever since. The Wake-Me Up Rosemary was also very nice. Do check out her site, and her soap! She is a real Wisconsin Artisan!

Salmon


I finished the Salmon wall hanging!

It is actually nice and square. It's my design wall that is a little warped, falling over a bookshelf behind it. I don't have the hanging pocket on it yet.

The pattern is from Quilts with a Twist in Alaska. When I ordered it last summer, they sent a nice note along with it. I live in Oshkosh, WI, and dream of going to Alaska one day ... They live in Alaska, and remembered coming to Oshkosh for the EAA Air Show one year, when they used to fly.


Here's a detail of the quilting. The quilting in the center was a free-form wave that went very quickly. The border is a wave pattern. I drew the pattern on quilting (tissue) paper to make sure the design fit the space. Then I laid the paper on top and stitched right through it. The stitching perforates the tissue paper, and you can pull it off afterwards. This technique works well where precision is important.

You can also see where I did a little thread-painting on the fish tail.

Whenever I have to do a machine binding, I like to watch this video by Bonnie McCaffrey, just to remind me of the specifics. If I don't, I invariably get something backwards and wind up ripping. She also suggests adding some couched yarn or special threads to embellish the binding edge. So I added some of that yarn I often use to edge postcards.

Wednesday, May 20, 2009

Wet Studio 5S'ed

One of the reasons I haven't produced much lately is because my work areas are such complete and utter disasters, that it's a tangible hindrance to creativity. For work this week, I'm learning all about LEAN, including 5S. The 5S-es are :
1) Sort
2) Straighten
3) Sweep / Shine
4) Standardize
5) Sustain

Here is a BEFORE shot of my basement Wet Studio :

The counter is so cluttered with stuff that I haven't been able to do anything new ...

After 4 hours of 5S-ing, the above mess became this tidy and LEAN version (Ahhh!):
Doesn't it just say, "Make something here!" now?

Things left on the counter are stirrers, measuring spoons, measuring cups, water pitcher, sop cloths (for those serendipitous clean-ups).

BEFORE : This is the cabinet under that cluttered counter. Things are shoved in wherever they will fit with no real rhyme or reason.


Here's the AFTER shot :

It might not look all that different, but things are in an order that makes much more sense now (ie, epty containers (dye pots) are on one shelf. Lesser used items are on the bottom shelf. Also note that the shelf spaces are labeled, so I'll know where to put things away again.


BEFORE shot of the sink area. Those are actually CLEAN dishes there in the sink. I do usually manage to do dishes after a day of mess-making, but getting back down here to put them away may be weeks later.


AFTER : The sink is empty, clean and shiny -- well, as shiny as it gets.


BEFORE : There's an old Library Card Catalog behind all that stuff. I've never gotten around to actually using it--until today.


AFTER 4 hours : I cleared away the stuff sitting in front of the Card catalog. The drawers now have labels. I decided to keep my paints in the drawers. The rod for the Library cards actually keeps the paints standing a at a slight slant, which makes them less likely to leak. [Sorry for the blurry pictures.]


In the Sort and Sweep stages, I discovered this chair that I'd forgotten about, along with 2 (count 'em) dust-pans with brush sets. I gave one to my husband for his side of the basement, to encourage him to sweep up his sawdust. ;-)

Although there's more work to be done, more piles to go through, this is a pretty good start. Maybe I'll actually make some soap this weekend??? or Dye something ... I have many more possibilities now that I have a usable work space again. Now the trick it to maintain it!

Sunday, May 17, 2009

Everyday Inspiration ; Oyster with Pearl, Mid-West Style


I saw this little gem on the sidewalk the other day ... I had to do a double take because at first I thought it was a pearl in an oyster shell.

"I do not weep at the world. I am too busy sharpening my oyster knife ..." --Zora Neale Hurston

I think it might be spider eggs on a piece of bark? Anyone out there recognize the critter?

I live near a lake, but we don't have pearl oysters--just little zebra mussels.

Wrapped Quilts


Wrapped Quilts returned from the Public Museum

Since this was new to me, I thought it would be worth a blog post ... The museum quilt show closed after Mother's Day last weekend. The curator contacted all the artists to pick up our "wrapped" quilts. I didn't quite know what she meant by that ... but I had an idea.

Museum curators have a real reverence for "stuff." They know how to take care of artifacts with an eye towards preserving them through the ages. My quilts were returned carefully wrapped in a cotton sheet, tied with cotton string. Protected from dust and light ...

Far cry from how I turned them in in February!

Baby Quilt mailed to Japan


I finished the quilt for my sister's new baby, due any day now. Mailed it off to Japan yesterday.

Wow! That riot of color is a bit much for me, but Oliver liked it, so I suspect the new baby boy will also like it.


I made a little tassle for one of the corners. I thought this would be a good "handle" for little hands.

Sunday, April 26, 2009

Fabric Portrait Resources : What I've Found Helpful ...

If you haven't figured it our yet, fabric portraits is/are one of my interests as an art quilter. Here are some resources I've found to be helpful with this journey:

Tutorials / Classes :


This amazing quilt is "Rundy" by Marilyn Belford.

Realistic Fabric Portraits with Marilyn Belford is an online class through Quilt University.
If you haven't taken an online class, it's a wonderful way to
* work with world-reknown teachers
* meet people all over the world
* be inspired by your fellow students
* and get the benefit of the problem-solving brain power of the class.
* And the best part is that you work at home--no schlepping a car-load of stuff to live classroom.


I was able to finish the face of The Oliver (aka Bubble Boy) Quilt by taking Marilyn Belford's class.
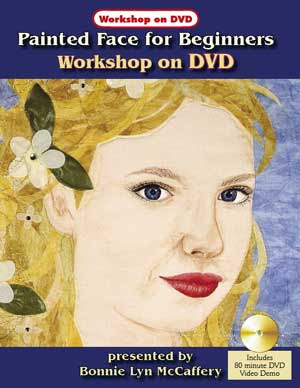

Painted Face for Beginners : Workshop on DVD (ASIN: B000XTVALG) by Bonnie McCaffery
and Portrait Quilts : Painted Faces You Can Do (ISBN-13: 978-0976693437)
I got the DVD more than a year ago, watched it, but have not been brave enough to DO it yet. Mostly because the tv and dvd-player at our house are nowhere near my studio space. Bonnie is a good teacher. Have you seen her monthly vidcasts, interviews and demos with world-reknown quilt artists? They are great!


Faces on Fabric - online class with Terri Stegmiller
A class combining quilting with a painted face. This class got me drawing faces, first. Then I wondered why I haven't been drawing faces for the last 20 years!
The photo above is the work-in-progress I made in Terri's class the past few months. I think this might be my new preferred way to do portraits.

Pam Holland has a nice tutorial on her website about portrait quilts.

Although I haven't had a chance to see these DVDs by Lura Schwartz Smith, they are on my wish list :


Workshops to Go : Faces in Fabric

Jukebox Quilts Presents : From Snapshots to Art Quilts

Here's another one on my Wish List :

The Quilting Arts Workshop : Making Faces (ISBN: 9781596681880) with Maria Elkins

Books :

Portraits for Fabric Lovers (ISBN: 978-1-4116-9735-5) by Marilyn Belford. Marilyn Belford explains how to go from a photo to fabric with an applique method. See also the Realistic Fabric Portraits online class at Quilt University. Marilyn is a wonderfully encouraging teacher.

Deidre Scherer does some amazing work! Her books, Threads of Experience (ISBN 0918949920) and Work in Fabric & Thread (ISBN 1571200444) are worth a look just for the inspiration factor alone.


Photo Album Quilts (ISBN-13: 978-1600591891) by Wendy Bulter Berns
Another book the explains the process of taking one of your treasured family photos and rendering it in fabric. Wendy is also an encouraging and enthusiastic teacher. Take one of her classes if you ever have the chance!
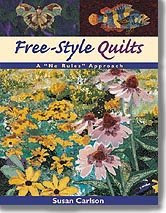

Free-Style Quilts : A No-Rules Approach (ISBN-13: 978-1571201027) by Susan Carlson
Susan Carlson is an amazing artist ... The book contains some amazing portraits like this one called Twilight :

I even purchased the autographed lithograph poster (and framed it!) just so I could study her amazing work. This is absolutely gorgeous! I can't wait to see what Susan Carlson does next!
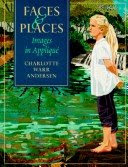


Faces & Places (ISBN-13: 978-1571200006) and Focus on Features (ISBN-13: 978-1571200532) by Charlotte Warr Andersen are two excellent books that explain the process of going from photo to finished quilt. Very useful for drafting patterns from photos, though I admit, I never did figure out her method of reverse applique. Faces and Places, if available is out-of-print and expensive. Don't forget to try your local public library if you want to look at at these books.
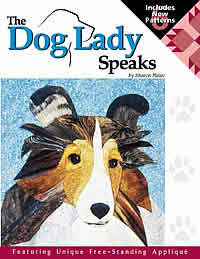

The Dog Lady Speaks (ISBN-13: 978-0970349606) by Sharon Malec is about pet portraits. It contains step-by -step instructions for Sharon's unique free standing applique plus a section on how to design your own Picture Quilt pattern. The how-to-do-it section is useful in creating your own patterns (not just for dogs). Although Sharon has patterns for various dog breeds, you'll want to make your own if your dog is a mutt (like mine).


Photo Fabrications (ISBN-13: 978-0952106074) by Angela Madden offers a good basic process for going from a family photo to a pattern to a finished quilt. Look at some of the other resources listed above for the details you'll want to add.

Do you know of other tutorials, classes, books, resources on fabric portraits? Please leave a comment and I'll add it to the list.

Paulette Insall offers an online mixed media class called All About Faces.

Wednesday, April 22, 2009

Sienna, So Far ...


Took the day off of work to make some progress on the class project for Terri Stegmeiller's Faces on Fabric class. This piece is called "Licking Frosting Off the Moon," or "Mama Let You Lick the Spoon" in honor of a couple of John Hiatt songs. Her name is Sienna.


This is the stitching on the stabilizer side. Most of the stitching you see is to hold down the applique pieces. There's some thread painting on the spoon and her eye brows. This is very similar to the drawing I started with.


Detail of her face. I still need to finish her nose, but that will have to wait for another day!


One of the practice faces I painted before working on the real thing. Good idea, too. The shading does take practice to get just the right amount of paint on the right brush--and then to put it in all the right places. This picture looks better than the real thing. In real life, she looks like she needs a bath.

Sunday, April 19, 2009

Progress on Little Gardener


Here's the latest progress on The Little Gardener quilt from the Wendy Butler Berns workshop a few weeks ago. The flowers got stems!

And I did some thread painting on the flowers :


I'm not quite sure what to do with her shirt/jersy. Any ideas?