Showing posts with label Addi Express Knitting Machine. Show all posts

Sunday, December 08, 2019

Purple Alpaca Mittens on the Addi Knitting Machine

  I did it!  I made a pair of toasty warm alpaca mittens on the little Addi Knitting Machine.


The first thing I did was to ply 3 balls of this wonderful purple Alpaca yarn (Thank you, Nancy Schmidt, for gifting me the yarn.) into a bulkier yarn.  The bulkier yarn seems to work better on the Addi where you only have 22 pins.  It makes for a tighter knit, less lacy product.    3 balls of yarn plied together was just enough to make 2 mittens.


Thanks to this video for showing me how to make mittens on the Addi:


You can get the official pdf pattern here on Ravelry.

As always with Addi tutorials, practice makes perfect.   I ripped it out several times before I was happy with the final product.  Fortunately, these knit up quickly on the Addi, compared to doing it by hand.

The crucial points are where you might be likely to drop stitches, such as when you are doubling up the cuff.  The hardest part for me was the thumb flap.  I kept losing stitches along the edges, and even had to put an extra stitch on the waste yarn because I kept losing them when I only caught 3.  I finally got it to work -- with a little practice.

Here's a detail shot of the thumb.  I thought this might come out a little clumsy, but it looks ok, and it's solid (no holes) with 6 stitches for the thumb flap. 

My pattern was slightly different from the video, in that I did 4-5 extra (29 total) rows for the thumb flap, and 3 more rows for the fingers (dome) part of the mitten.  It probably would have been ok with the recommended 30 rows for the dome. 

If I were to make them again (and I just might do that!), I might do a shorter cuff, too.  Maybe only 2/3 of what she did in the video.


Here are my notes from watching the video:

1) Knit 5 rows (or more) on waste yarn.  Use a contrasting color so it's easy to see.
2) Make a slip knot in your main yarn, and loop it on the first peg.  Knit 30 rows for the cuff.
3) Fold over the cuff by reaching into the middle of your tube and attaching Row 1 (after the waste yarn) to Row 30.  This takes a little time ...
4) Knit 12 rows to the base of the thumb.  Go slow with the first row, as it will be the hardest.  Watch the stitches and make sure they drop below the lip so you don't lose them.
5) For thumb (16:41 min in the video),  Switch to Flat Panel knitting on 6 stitches only.  Secure the 3-4 stitches on either side of your thumb flab onto waste yarn as they are likely to fall off.  This is stitches 7-8-9-10 and 19-20-21-22.    Knit 29 rows for the thumb flap (She says 25 in the video). The lst row should be facing <.
6) Pick up the stitches on the waste yarn to either side of the thumb flap.  Try not to split the yarn.  Place them back on the open needles.  Don't remove the waste yarn until you know the stitches are secure.  It will be easy enough to pull out when you're finished.
7) Knit 30 rows for the dome of the mitten to cover your fingers.  You can add more rows if needed to fit your hand.  This will vary with the yarn you may be using, and the size of your hand.
8) On the last row, cut a long tail, and thread it through the final row of stitches on the needles.  This will create a draw-string action to cinch up the top of your mitten.  Secure the tail.
9) Turn the mitten inside out and stitch up the sides of the thumb.

That's it!  Toasty and warm!

Now I'm trying to decide if I will make a lining for these ... I guess I should try them without first to see if it's needed.

Thursday, March 14, 2019

Breaking Wilton's Violet on a Sock Blank for a Dyed Ombre Gradient

Wow!  I am amazed at the variety of colors I was able to get by breaking Wilton's Violet with the dip dye method on a sock blank.  I got :
  • Raspberry
  • Purple
  • Lavender
  • Blue
  •  and a Light Blue
I was really surprised to see the colors come out so much lighter than in earlier Broken Violet experiments.  But I think that was due to the dip dye technique and the 5-foot length of the sock blank.  With a skein, you drop in more of the yarn (coiled in a hank) at one time than you can with this technique.   I am continuing to follow Rebecca at Chem Knit's Dye Pot Weekly experiments.  This is her technique / process.


For this batch, I used "I-Love-This-Wool Naturals Pure & Simple" yarn purchased at Hobby Lobby.  The normal price is $5.49 for 113 grams or 220 yards.  It's a #4 medium weight yarn.  Ivory color.  It washed up nice and soft.  I'll probably buy this again ...

I used my little Addi Express knitting machine to knit up a "sock blank."   I used up the whole skein of yarn to make a knitted tube that was about 5 feet long, or 385 cranks on the Addi.  I didn't keep track of how long it took me to crank it out, but I'm guessing less than 45 minutes?  It was kind of fun, and satisfying to see that knitted yarn transformed to quickly into fabric.


As I was cranking away to make the sock blank, I felt like the horseman in the kitchen grinding coffee for Babette's Feast.  He was just helping out.  I couldn't find a picture of him, but this one will have to serve to evoke the feeling.  This is one of our all-time favorite movies.  We watch it every year at Thanksgiving time. ;-)

The sock blank was a whole new concept for me.  Using the knitting machine to whip up a blank -- essentially a fabric tube (No--not a sock at all!) --that can be dyed, and later unraveled to make something else.  In the video, Rebecca states that you can buy sock blanks for dying, and they will often knit 2 strands of yarn, so you can make a pair of socks dyed with the very same gradient.  Brilliant!


It's purely functional, and part of the process.  The Addi does 1 stitch very well, and quickly, at 1 particular guage -- which is not what you want in all cases.  The final project you would make with this yarn will likely be a finer knit or crochet or woven than the Addi made.


After making the sock blank, I let it soak in room temperature water with 1 T. white vinegar for 20-30 minutes.

The Dye Pot set to simmer on the stove:
  • 10 cups water (approximate)
  • 3 T white vinegar
  • 1/2 tsp Wilton's Violet (Dissolve this in the hot water) 
  • Bring the dye bath to a boil, then reduce the heat, so there are no bubbles rising at the time you add the time you add the yarn.
 Dip Dye Process
  • Feed some of your sock blank snake into the dye pot.  Dip in and out / raise and lower continually.  
  • When you see the colors change, add a new section of the yarn blank
  • Watch the colrs change though the gradient.
  • When you've added the last portion of yarn, cover and let simmer for 10 minutes.
  • If the colors have developed to be what you wanted, turn off the heat.  Remove the dyed sock blank carefully, so as not to felt it.
  • Let it cool, then wash and rinse until water runs clear. 

It's also satisfying to unravel [I love this video for James' Moving On, as a meditation on life an death, done in stop motion with the metaphre of a ball of yarn unwinding her and winding up there.  Enjoy!]   it so quickly (less than 5 minutes!), and not feel bad that you put so much time into the knitting -- because you didn't!    It's purely functional knitting -- a means to another end.


via GIPHY

The next step is to use the ball winder to wind it up into a cake, which allows you to more easily see the gradient you've created.  All those long color changes ...  Very nice!


So often you see these kind of cakes for sale, with the long color changes.  I figured there was a much more awkward way of dyeing those with separate bundles of yarn and separate dye pots ...  I have not ventured into that technique yet.  Of course this one works for breaking violet and the specific colors it contains.  If you wanted other colors, you'd have to use a different technique.

This was a very satisfying project!


If you want to try it yourself, watch Rebecca at ChemKnits Dye Pot Weekly Video on Dip-Dyeing a Pre-Knit Blank to Create an Ombre Gradient:

Sunday, March 03, 2019

Purple Alpaca Wristers and progress on the KB Sock Loom


Made this morning on the Addi Express Knitting Machine.  This is 3 strands of a fine alpaca yarn someone gave me a while back.   Basic instructions in this video.    These are toasty and warm.  I'm hoping this yarn won't pill up like the black acrylic did.

Here's the yarn I used.  Someone gave me a nice big bag of it a few years ago.  It looks nicer worked up with multiple strands than it does with the single strands.  Funny how that works!


I also worked up a sample swatch of this multi-blue wool yarn that I dyed with my friend Lynda a few years ago.  I was wondering how that might look in a pair of socks.  Not bad!  Just means I need to dye up enough to make a pair.

Just bought a stock of 10 skeins of Merino Wool during the 30% off yarn sale at Joann's.   Looks like I was just in time yesterday for the sale, as now they are back up to full price.   Lynda and I have another Colors / Dying date next week.  I'll have to think about what color combinations I want in the meantime.  And how big to wind the hanks for socks.  

I got the KB His and Hers Sock Loom set.  It's plastic, so the pegs have a little give to them.  I was having a tough time with the original KB adjustable sock loom with metal pegs for a number of reasons.  This one works a lot easier for me.  I am practicing with some wool yarn -- just cheap nothing-special Fisherman's Wool.  I've been ooh-ing and ahh-ing over the great variety of sock yarns out there.  Most of which I can't get locally, but would have to order online.  I really want to FEEL it before I buy it, and I'd also like to know how it will knit up before putting a lot of time and effort into it.  Of course that sends me down yet another rabbit hole of DIY dying ... and makes me want to play with colors again.

The photo above shows the emerging toe box, with the requisite decreased and increased stitches. It's kind of amazing to be creating things in 3D like this, to see it emerging from below.  

This is the back side of the photo above.  This shows the Kitchener Cast-on (not unlike weaving).  This will get cinched up later on, closing the seam at the ball of the foot.

Here's the view from the inside.  Nice and orderly.  
This is what I've gotten done since Friday evening.  Not bad for a knitting meditation.

Sunday, January 20, 2019

Loom Knitting 2 ways


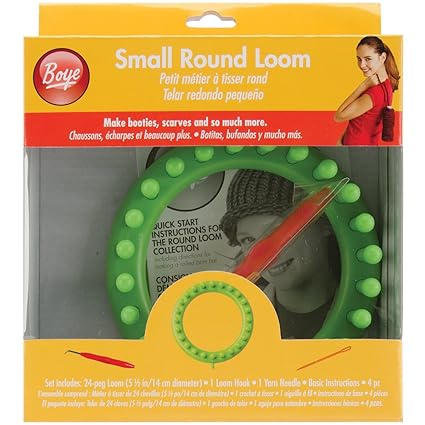
I made a pair of fingerless mitts for OKL's birthday on the green Boye knitting loom -- slow work, but done in 2 wkds.


When I finished his this morning, I got out the Addi Express Knitting Machine and tried to make the same thing on the little knitting machine.  It worked beautifully, simple and easy! 

Here's the comparison:

Image result for boye knitting loom green

 OKL's half gloves on the green Boye Knitting Loom by hand (slow work).


And here are the ones I did this morning on the Addi Express in less than an hour (90 minutes to finish everything).  It's almost hard to tell the difference, since I used the same yarn.   But these are indeed 2 separate pairs of Half Gloves.


I think I'll have to stitch some stars onto mine, just so we can tell them apart.
It is a good day!