Friday, May 31, 2019

Sakura Dyed Yarn


I did it!  I've been thinking about this one for years!

I let 2 hanks of yarn (I'm using Marly Bird's Chic Sheep Lace as a base) warm up in the crock pot as the water came to temperature.  When it was hot, I pulled out the yarn, temporarily.   Added 3 T. white vinegar.


In a separate smaller jar of hot water, I dissolved 2 drops of Wilton's PINK from their color-right system.   Yes-- 2 drops was all it took to get this!  When the drops had dissolved, I poured it into the crock pot, but did not stir.

Then I plopped the hanks of yarn back in.  It picked up the color where it lay.  I did not stir, as I wanted there to be some white left on the yarn.

I let that sit for a few hours at temperature for the colors to set.
Rinse and dry the Sakura blossom yarn.


Stage 2: Dry Rub
I wanted some bit of gray on this yarn to simulate the cherry tree trunk.  I decided to use the dry rub technique demonstrated in this video by Rebecca at ChemKnits :


Come to think of it, I might want to try this again doing it ALL with the dry rub technique.

The black was meant to be the tree trucks, to anchor all that fizzy pink. 

 Although I had intended for black or gray, Wilton's black has more nuance to it -- with burgundy and green in it. 

Even a little purple.

Thursday, May 30, 2019

Equipment Makes a Difference : Review of Knitting Looms


I've often said that equipment makes a difference, but then so does getting to know your equipment and making it work well for you.  Master those elements, get to know what they can do, and you'll create a good partnership!


Back when I was learning to skate, I was amazed at how much my spins improved when I could afford to buy a pair of skates that actually supported my ankles.  With the new skates, I could land jumps -- again, because the new skates provided so much more ankle support than the too-big hand-me downs from the 1950s.  Equipment made a huge difference there!

Back when I was in grade school, and learning to play an instrument, my parents bought me a crappy old  $35 flute.  (To their credit, they didn't know if I'd continue, and it was what they could afford at the time).  The finish had been worn off in all the places it contacted previous player's skin; Most of the key pads needed replacing.  The old foam in the case stunk like I don't what.  I remember spraying it with Lysol to try to get the nasty smell out of that old foam.  It was in rough shape all the way around, but I was determined to play it--and I did manage to get a decent sound out of it, but no one else could play it.  I had somehow managed to make it work for me, because that's all I had.  When I got a job and had a little money, I bought myself a shiny (used) Armstrong flute, which I cleaned and polished after every use.  I took care of that beauty because I knew what could happen if I didn't, and also got a good sound out of it. 
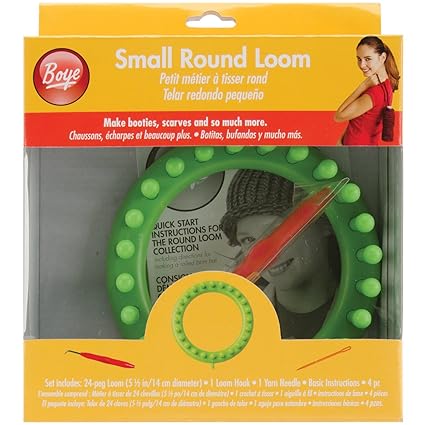

GREEN BOYE
When I was learning to use a knitting loom (only a few months ago), I started with a chunky-sized plastic green Boye loom -- because it was cheap and locally available at the craft store in town.  I made a pair of fingerless gloves and was so pleased with the results that I kept going ... Perfect for learning the basics with a chunkier yarn.

KB Sock Loom
I'd also purchased an adjustable Knitting Board Sock Loom with metal pegs, because socks were the ultimate goal.  And the idea of having 1 piece of equipment that was adjustable was appealing for my already overcrowded craft space.  But try as I might, this loom had 2 main issues for me :
          1) The metal pegs had no give, unlike the plastic pegs on the Boye loom I started with. This made it difficult to get the tension right, or even to pull the working yarn over the pegs.  You'd think I would have just learned to work looser, but no ...  Sort of the same issue I had with knitting needles and too tight tension.
          2)  That adjustable / moveable bar seems like such a good idea, but if it's moved inward for a smaller rectangle, it's very difficult to work the recessed pegs because the other pegs get in the way.


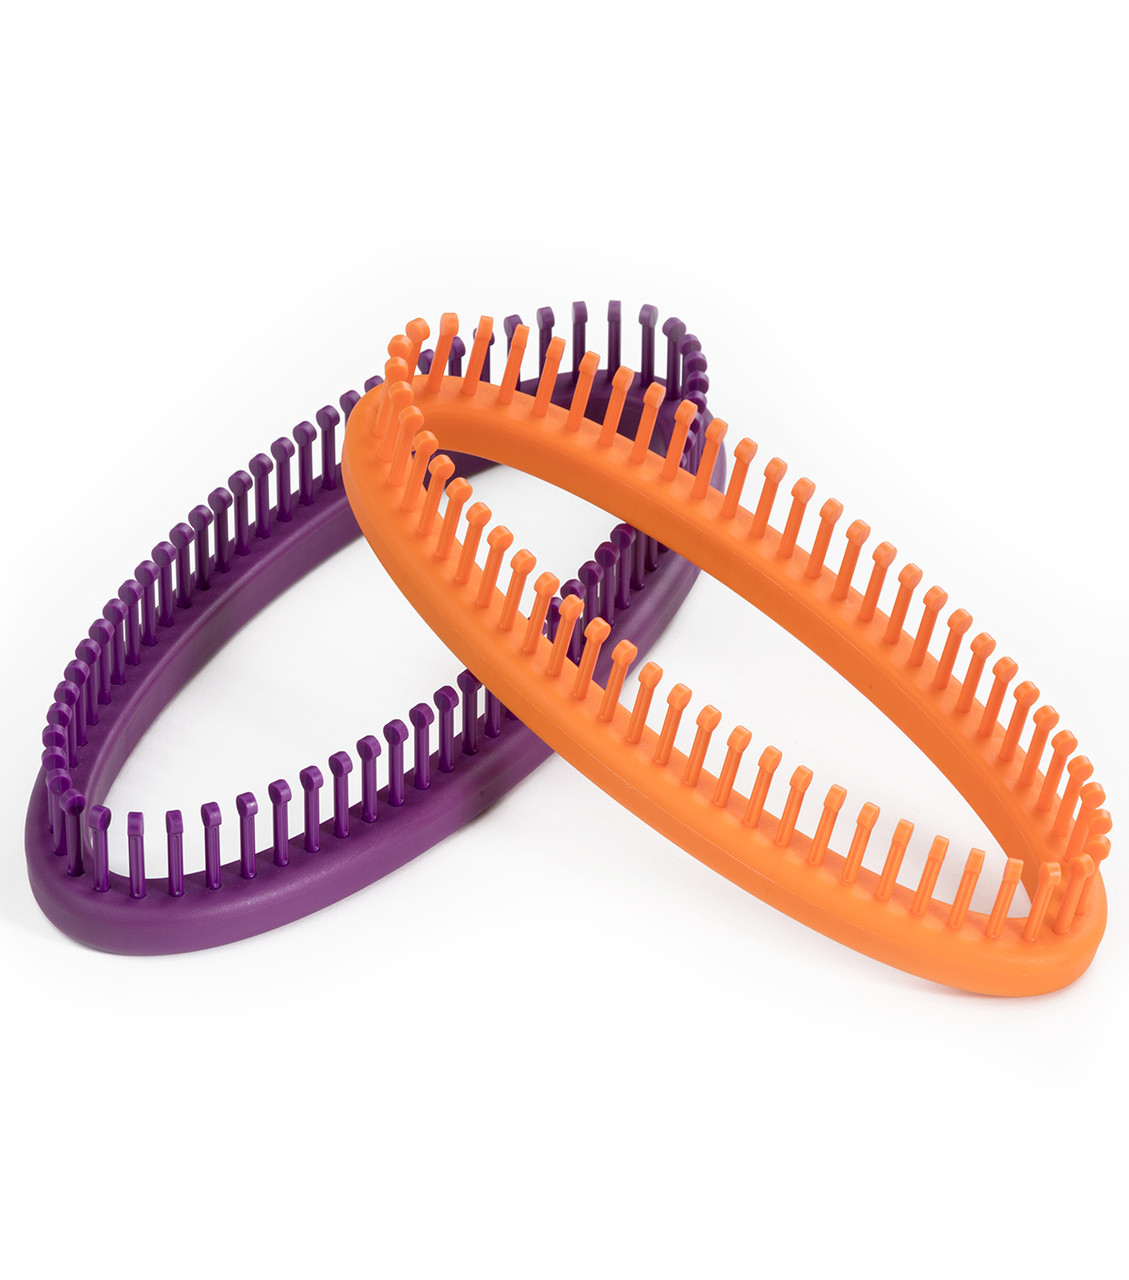
His and Hers Knitting Board Sock Loom
  • It's plastic so the pegs have a little give to them as you are working the yarn around.  
  • It's strong, too.  I've been putting quite a bit of tension on it, and haven't broken any pegs yet.  
  • Additionally, the pegs have that little score line in the front, making it easier to get the pick behind the yarn.     
  • The oval shape means you just keep working in the round, with no corners to maneuver about.  No awkward inside edges.  I have to hand it to KB -- They must have been listening to their customers, and designed the tool  they wanted! 
  • I can definitely work with this one, though I haven't finished a sock on it yet.
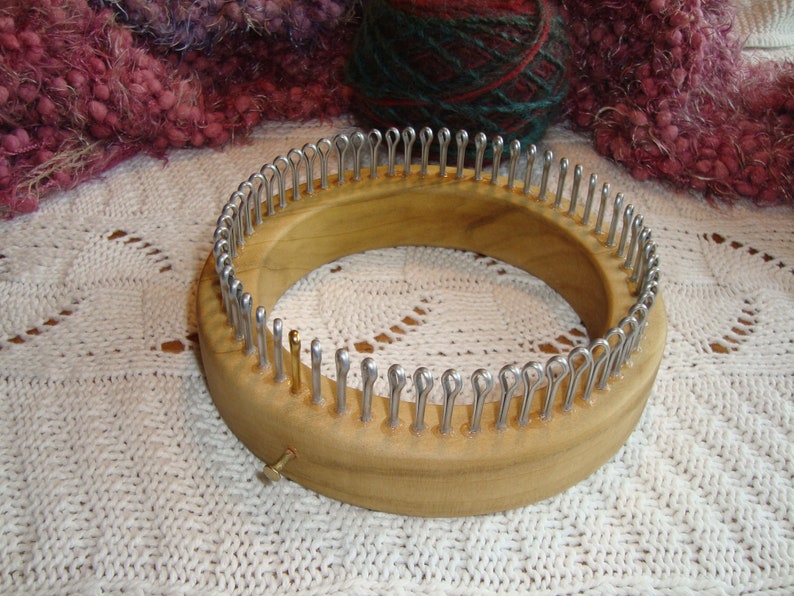

Cottage Loom
After seeing the vintage (and very expensive) mechanized sock knitting machines, and knowing I couldn't justify the purchase, I opted for a handmade analog model in Cottage Looms.
  • These knitting looms have a round wooden base, good and solid, with a warmer feel than the cheap plastic looms.  
  • They are strong with a pegs made of cotter pins.  I really liked the look of these, and bought 2 in varying sizes (one for wristers, and one for socks). 

And then I tried using it ...  Much easier to use than the wooden rectangle KB Loom, because you work in the round.  But those cotter pins being metal (again) have no give.  It was very hard on my body, and difficult to pick up the yarn as there's no score pull the yarn over the top of the pins.    This also caused the yarn to split because you couldn't quite get just the one yarn vs the second.  Or maybe I chose the wrong yarn?  The pick that came with it, is finer than the one with the Boye or KB Looms.  It's all metal -- probably from a hardware supplier.  I'll need to get a cushy grip for it, if I continue to use it.  Maybe I just need to work with them a bit more, to figure out how best use it ... Or maybe I was using the wrong yarn?  I had an acrylic yarn -- soft and dark blue.  It kept splitting.  Maybe it didn't have enough spring to work on this loom?  Later, I tried a springy merino sock yarn, but I still couldn't make it work.  Very disappointing.


Enter CinDwood Looms.  This might be the best of both worlds.  You work in the round, so no corners or sharp edges.  A medium-density fiberboard (MDF)wooden base with plastic pegs that have some give to it. The MDF base was kind of rough and chalky -- I had to sand it down a bit, and find a nice finish for it.   Feed n Wax worked well, and smells orange-y.

CinDwood also sent a nice sturdy pick along with it.  It is fortified with a pencil grip and some plastic tubing to make it just a little more ergonomic than the bare metal.  I know they also sell other picks with an ergonomic handle.

Of course, you have to use the right equipment for the right yarn.  And a nice springy sock yarn works great on the CinDwood loom.

Monday, May 27, 2019

A Tale of Two Socks


I finally finished the second sock to match the one I made here.   I used Hypnotic Hysteria's pattern, which is quite simple one you understand the basics. 

Since this was the prototype and otherwise the first socks I've ever made (ok  -- 2nd pair of socks), I can offer some observations about the process.


When I realized 1 skein of yarn wouldn't quite be enough for 2 socks, I dyed another skein of speckled yarn with Wilton's broken violet.  It must have been a slightly different process (more or less vinegar, more or less time to develop, more or less steam, more or less water in the yarn to begin with) because there are subtle differences in the each sock.  One has a bluer background, and the other is a little more pinkish.  Don't get me wrong -- They are both pleasing to the eye -- THey just don't quite match.


Note to self :  Dye 2 skeins of yarn at the same time with the same technique (if not simultaneously) for socks.  That way, you are more likely to get a matched set.


Here's the speckled yarn I dyed a few weeks ago with broken Wilton's Delphinium Blue.  It appears that these skeins seem to be much more alike than the violet skeins I did separately above.    I am already starting a new pair of sock with this yarn.    Yes--It was such an enjoyable process, I'm doing it again!

Also since this was the first "real" pair of socks, I learned some additional things.


1) The CinDWood 56-peg 1/4-inch Knitted Knocker Loom is my loom of choice.   It has plastic pegs that give a little while you are working the yarn.  It also has these nice little scores in the column of the pegs where you can run the hook to get at the correct loop without splitting the yarn.  Believe it or not, this was a huge problem on one of the other looms I tried. 


2) A sock made on the CinDWood loom fits my foot just about right, so long as I knit it the right length.  The first sock was an inch or so too long (75 rounds after the toe box) for my foot, so I made the 2nd sock a little shorter (65 rounds is sufficient - or 7-1/2 inches from toe to ankle bone, just before beginning the heel).    Seeing as how I have a mis-matched pair here, I'll just keep these to myself.  Prototype kept for study purposes.

3) It appears I'll be able to make socks for my husband on the CinDWood loom as well -- I just need to make them a little longer to fit the length of his foot.  Otherwise the width seems like it will work for him -- which surprised me, but ok.    That means, I can also make socks for my dad, too.

 Delphinium Blue Speckled yarn on the Knitted Knocker Loom.

Now what other colors do I want to dye for socks? 

Sunday, May 26, 2019

Delphinium Blue Speckled Sock Yarn


I liked the Violet speckled yarn so much, that I wanted to try it the the Delphinium Blue, hoping to get a little less fuscia, and little more light blue bleeding onto the white.


If you want to make some of your own speckled sock yarn, check out Chem Knit's tutorial, where she uses 1/8 tsp Wilton's icing gel with a little water.  She uses a fork to apply the gel to the yarn in a speckled pattern. 


It worked nicely.  These will make a lovely pair of socks one day!


The Delphinium Blue has a slightly different blue and less fuscia from the Violet speckles.

Saturday, May 25, 2019

Merlot and Black Cherry Yarn


I did another batch of yarn dying on the stove this weekend.


I used some of my old Procion dye, already mixed to the preferred colors : Red Wine and Black Cherry.


I watched this video by Rebecca at Chem Knits where she demos dyeing a gradient on a loosely wound ball of yarn.  She is using a different type of dye and cotton yarn, vs. Procion and wool yarn, but the general technique is the same for kettle dying a loosely wound ball of yarn.  The chemistry is a little different when using Procion dye on wool.

For a 100 gram ball of yarn, here are my proportions (though I probably would even need this much vinegar and salt):

1-1/2 T salt
1/3 cup white vinegar to the pot of hot water.

Separately, I also mixed up some dye stock with about 1-1/2 tsp Procion dye dissolved in hot water.  I like to shake it up in a bottle with a cap that closes tightly and reliably.

When the water was near to boiling, I added some (not nearly all) of the dye stock, then added the loosely wound ball of yarn.  It had not been pre-soaked ahead of time, so it took a little more effort to get it submerged.

This is how they looked in the dye pot as they were starting to take up the color.

To the Red Wine ball, I added a splash of black cherry over to top and down the middle -- just for a little more variation in color.

To the Black Cherry batch, I added a splash of the Red Wine dye stock -- afain, just afor a little more variation in color.

I am loving how these turned out!  Kind of like these beautiful Malabrigo Yarns.
I will definitely be doing more of this technique in more colors.  Maybe green and blue to start with ...


The only problem is that the balls are so loosely wound that they tend to fall apart during the process.  Then it takes extra time to unravel everything.  I should figure out a way to keep it all together during the process -- maybe an onion bag that would allow the dye to penetrate, but still hod the general structure of the ball together during the process?

Friday, May 10, 2019

Apple Blossoms

Apple Blossoms

Photo taken in my front yard.
Processed with Topaz Impression - Oil Glaze BR filter.

Saturday, May 04, 2019

Dyeing Wool with Procion Dye -- Kilt Greem, Sky Blue, Rosewood, Leaf Green

Kilt Green (Procion dye -- looks dark gray) 
Wilton's Copper and Kelly Green

Dharma offers some good instructions on how to dye wool with Procion fiber-reactive dye.  Normally you'd use acid-dyes on wool because it's a protein fiber, but the soda ash required for fiber-reactive (Procion dye) is destructive to the wool fiber.

The trick is to use salt, white vinegar, and heat in place of the soda ash, which can severely damage wool.  I did a 2-pound batch in a large pot used for canning.  I also simmered it for 2 hours, instead of the recommended 20 -30 minutes.  Then it sat in the pot overnight to cool down.  Then I spent the next few day soaking and rinsing out the excess dye, salt and vinegar, rinsing the water several times until it ran clear.

In my first experiment, I used an old jar of Kilt Green on gray-ish merino salvage strips from Pendleton 9at the bottom of the photo above).    In the dye pot, it looked blue black-- like a Raven.  Not green at all.  When the wool was washed and rinsed, it came out to be a dark gray.  Obviously much darker than the original light gray strips, but nothing I imagined to be Kilt Green.

Won't this look lovely with a few Granny Smith apple green strips as accents?
Or maybe a clasped-weft with bight on one side and dark on the other?


The second time, I used up a jar of 10-year old Sky Blue.  7 teaspoons seemed about right for 2 pounds of wool strips.  When the pot had cooled, the water was just a pale blue, very nearly clear -- I've never ever seen fiber reactive dye exhaust like acid dyes do--until today.  Even the rinsing was easy.  And the color appears to be staying on the fiber. 


Then I tried some old pre-mixed colors-- Rosewood (above) and Leaf Green (below).


The Leaf Green has a bluish cast to it.  Very nice!  I did one pot of the woolly worms, and one pot with a large skein of yarn for wool warp.  This cone of rug warp appears to have some sizing on it -- I should have scoured it ahead of time.  I let it pre-soak in the dye pot as it was warming up.  But it was giving off an odd smell, and the water clearly had something else in it -- the starch/sizing -- before I put in the salt, vinegar and dye stock.  I kept it going, despite that additive.  It did not seem to hinder the yarn from absorbing the dye.


It's such a nice color, I wanted to try it on the woolly worms, too, to see what kind of contrasting colors I'd get.    Very nice!

This method is working out very well for imparting color to Pendleton merino wool strips, woolly worms, and wool rug warp.   I can vouch that Dharma's method here works out pretty well--even with old dye.