Sunday, September 29, 2019

Spinning the Afternoon Away at Lindago Alpaca Farm

Spinning at Lindago Farms

I spent the afternoon spinning with these ladies next to a herd of alpacas at Lindago Farms in Neenah.  They had an open house today where people could come and see the animals (chickens, alpaca ...) and visit the fiber shop where they sell alpaca socks and other fiber goods.

Three wheels on display today:
In front is a Kromski (made in Poland).  In the middle is a Schacht Matchless (made in Colorodo).
I brought my Louet (made in Denmark).

The lady at the end is weaving on a pin loom.
A very contented Alpaca looks on approvingly. ;-)

My friend Linda was demonstrating how to wet felt alpaca fiber.

Deb has a great activity she does with kids that allows them to experience the wonders of spinning wool into yarn.  She has a hook that the kids turn manually, while she handles the yarn.  They make a "woolly worm" that the kids can take home with them to use as a bookmark or a bracelet or whatever.  She's a great and patient teacher.   And she spins some beautiful yarn!

I got a good deal on a beautiful white batt suitable for quilting.  Twin size.  I even have a few finished quilt tops in mind for it.  So soft -- Or I could just spin it outright.  Beautiful stuff!


Linda gave each of us a ball of alpaca yarn for our time this afternoon.  
Can you see the little glints of sparkle in it?  Very kind of her!

Carding Wool for the Season


Finally a nice, not-too-hot or humid or rainy day where I can be outside for carding fiber.  It's definitely a task for spring and fall.

Last week, I used my new wool picker (Still need to work up that post) to open the fibers on a really nice wool and silk mix.  The bottom of the bag had gotten mashed, and that layer was getting difficult to spin, even after dizzing it.  So today I did the next step in preparing the fiber for spinning: Carding it on my Patrick Green carding machine.

Here is the carder (on Gramma Pickles' little card table!), loaded up with fiber to be carded and combed in preparation for spinning.  2 or 3 loads like this was enough to make a good-sized batt. 

Carding can be hard work, so I don't always look forward to it.  But low-and-behold, having done the previous step of picking the fiber and opening it beforehand, things went a lot smoother this afternoon.

I carded that whole bag of wool and silk "cloud" into about a dozen batts.

I was sitting next to a giant stand of purple asters which are in full bloom.  At any given moment, there were a dozen butterflies on it, and countless bees diligently doing their work gathering nectar and pollen.  They didn't seem at all disturbed by the carding process.

They look a little funny because I've started rolling them into rolags, straight off the drum carder.  I can't remember where I learned that, or I would give that person credit!   Although I have learned to spin off of a batt (It's not hard), the rolags are a little more compact.  It's like the fiber knows what to do and almost spins itself out of the rolag.  Well -- not quite.

I am preparing for tomorrow afternoon.  I volunteered to spin at an open house for one of the local alpaca farms in Neenah.  There will be a few other spinners there, too.  I decided to stick with my old standard -- nothing fancy spinning-- because it's too easy to loose track of what you're doing when you're chatting with the other ladies.  

I really do want to start on that fancy art yarn with an art batt ... Soon, but I think that's best done at home where no one will be watching me!

Saturday, September 28, 2019

Carding an Art Batt

Freshly carded art batt, looking very much like a cocoon!

Sometimes crafting is like "shaving yaks."  In order to do one thing, you need infrastructure to support it, which means you have to get other things ready before you can "do the thing."

Before I can spin an art batt, I have to have an art batt to start with.  Fortunately, I was able to order a few online to get me started.  So I can study how it comes out, the structure, the color and texture mixes, what fibers and in what proportion ...  Then comes collecting and gathering your fibers.

I ordered a couple finished art batts from Wild Thyme.


I ordered the ingredients from Big Sky Fiber Arts.  They send a bag of mixed fibers in different color ways.  I ordered purples and greens.

This is how they looked released and unwrapped from the bag.  It still needed to be carded together.    Really a nice combination!    Ah-- but how to do that without blending all the fibers into mud?

 One of the videos I watched recommends layering your chosen fibers into a sandwich, that you can then feed into your carding machine. 

Here's the first batt.
You can see this one rolled up into a rolag at the top of this post.  

Here's the second one.  This one is a little more blended -- like a landscape.
I kept trying to feed in the fiber that was sticking to the intake roller, and things got progressively more mixed.  I am looking forward to spinning these batts!

For my own reference, I am also adding some of the videos I watched to learn this technique:


Fortunately, there are some great how-to videos out there on YouTube.  I found this one by Ashley Martineau where she uses a sandwich technique that seemed to get good results.


Here's another one where she uses a "painterly technique" where she bypasses the intake roll, and just "paints" the fibers on the top roll.


Here's one from Blue Mountain Hand Crafts.  I am intrigued by the "fiber salad" she starts with and the beautiful batt that results!

Here's a tutorial from Staunch Fibers:
How to Give Forgotten Fibers a Bat-tacular Makeover.

Tuesday, September 24, 2019

Starting a New Pair of Socks with Blue Hand-Dyed Yarn


I am so happy with the way this yarn is knitting up!  This is from the teal blue batch way back in June.    Gorgeous!

 
I ordered a second knitting loom in the same size from CinDWood Looms, so that I can work both socks in stages.  This is supposed to alleviate "Second-Sock Syndrome" where you finish one sock, but can't bring yourself to start over with the 2nd sock (or can't remember how to start it) to finish the set.  This strategy also helps you to remember what you did at each stage (How many rows for each section of the sock,.)  This way, there's a better chance you'll have 2 socks the same size.   
I also got a 2nd row counter to keep track of the second sock.  

The sock on the left is farther ahead, with the kitchener seam all closed up under the toe box.  
The one on the right was just started this am, so you can still see the kitchener strings hanging loose, but orderly.  The toe box is just beginning to emerge.  It's like working in sculpture with these 3-D objects taking form!

 
View inside the newly forming socks. 


Sunday, September 22, 2019

Blue and Green Scarves Off the Loom and Finished


This is the No-Hassle Rayon Slub kit from The Yarn Barn of Kansas.  I decided that kits would be a good way to learn weaving, since then I could concentrate on warping and wefting without being worried about colors syncing or how long to run the warp, or even the weave structure.  More of those questions are already decided for you when you get a kit.  And the outcomes is more of a known quantity, too.


After cutting it off the loom, I knew I had some repair work to do. A couple of warp stings had broken in the process of weaving.  Although I repaired them as soon as I noticed them, there was still some repair work to be done, weaving in the new warp threads.  Not my favorite thing to do.  Although when I finally sit down to do it, it goes faster than I think it will.  It's not hard or complicated work.  Just takes a little patience.

After a few small repairs, it was time to take care of the fringe.  Hmmmmmh-- What I was doing wasn't quite working ...


Thank goodness you can just check the internet for a how-to video.  And I found this video at The Woolery to explain the right way to twist fringe.


I don't have one of those nifty little fringe twisters.  It's one of those over-priced tools I just can't bring myself to purchase.  We could make one, but the metal work has me a little freaked out ...    I did get one of these gadgets for less than $10 at Walmart.  Opening the clips at the ends was a little futsy, but it does the trick for my fringe-twisting needs. It looks like you can get them for even less on eBay now.


One of the cut strings on the edges was a little short, so I did those by hand.  It wasn't as bad as I thought it would be.


Modelling the blue scarf.

Modelling the green scarf.
The weather has been overcast and gray for more than a week now (not that I mind at all), but it maes it hard to get true-to-color pictures -- especially of the green scarf.
It's much prettier in person.


They have a really nice drape -- as rayon is known for.  They really softened up after wet-finishing (basically washing) them, to allow the fibers to get more comfortable in their new positions.

Sunday, September 15, 2019

Spinning Art Yarns


This is what I was looking for (in blues) at this year's Sheep and Wool Festival, but I wasn't seeing it this year.  Maybe it's already out of fashion?  I am often behind-the-times with things like this.  It takes me a while to figure out what to do with things I might see at a show --- and by the time I get the idea, I'm already home.


I found this helpful video that explains how to make my own thick and thin art yarn with sequins.  Yahoo!   So that's what I'm gonna do!  [Not to mention that the speaker looks like a younger me! ;-)]

Natasha Leher Lewis from Esther's Place makes it sound simple and straight forward.  I'm pretty sure I can do it after all these years of spinning.

Ingredients:
  • Crazy Art Batt (I bought art batts from Wild Thyme and Big Sky Fibers  See below ...)
  • Merino Top dyed in coordinating colors
  • Sparkle Sequin Thread (Maybe this one?)
  • And of course, your spinning wheel.

In the video (which is from 2016), she says she sells those art batts and the coordinating merino top through Ester's Place Fiber Arts.  But in 2019, I am not seeing anything available now. It looks like she has moved on to a fiber arts career.  Good for her!

I don't want to take the time to mix my own art batt (because that would also require dying all the fibers individually and buying a bit more sparkle), so I think I might buy one.
I think I have a good pound of top that I can dye in the coordinating colors.
I just hope I can still get the sequin thread locally.  If not, I'll buy that, too.

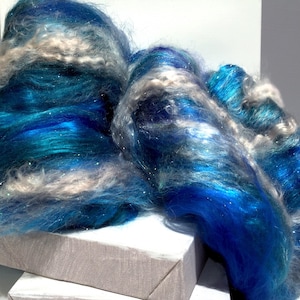
 Blue and Silver Art Batt from Wild Thyme (4 oz)

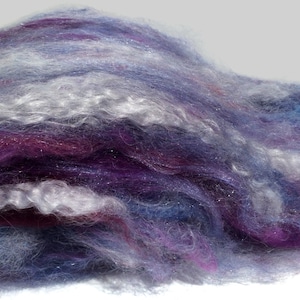
Purple Art Batt from Wild Thyme (2 oz)


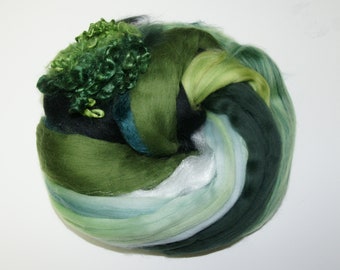
 Bag of Brilliance - Rain Forest from Big Sky Fiber Arts in Montana
They also had another one in blues and silver called Dusk.  Though when it came, there was a bit more purple in it.  I'm fine with that!
These were not in a bat form, but I can make my own with my handy drum carder.
Stay tuned for another post on this series!

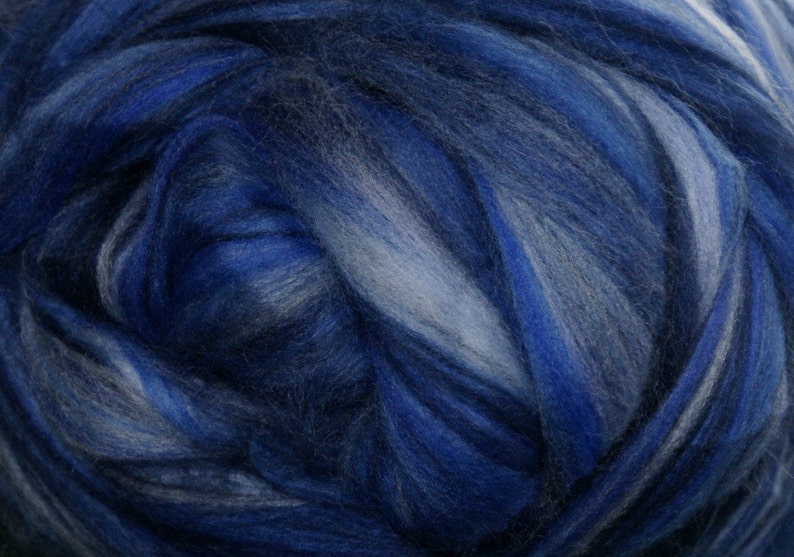
I also ordered some of this Ocean roving from Big Sky.  Not enough for the whole project, but if the colors are a good match, I think I can dye more of my own.  I certainly have the fiber siting around!


I think Big Sky Fiber Arts might have been at the Wisconsin Sheep and Wool Festival. I remember seeing these bags of fiber, but not having an idea of what to do with it until the next day!


Like I needed another project!
But then, this is the season for spinning and fiber!


I used to be able to get a Yarn Bee yarn that had sequins and sparkle in it.  That has not been available for quite a while now.  But with the guidance in the video above, I'll be able to make my own with the simple addition of plying with a purchased thread that has the sequins on it.   Let's hope I can still get that!


Saturday, September 14, 2019

Black Cherry Yarn

Black Cherry Hand-dyed Yarn

Another batch of black cherry yarn, dyed on the stove top with Procion Dye, salt and vinegar.  This one came out plummier than the earlier batches because I did not add a splash of wine red this time.  Still lovely!  I used my favorite method of dying a loose ball of yarn held together in a net onion bag.

In the Dye Pot,
1-1/2 T salt
1/3 cup white vinegar (No soda ash, as you would normally use with Procion dye.  It can damage wool fiber, so we substitute vinegar and heat instead.)
Enough water to cover / submerge the balls of yarn,held together in a loose re-used onion bag (just to keep it from unraveling in the pot.

Heat this until it gets just ready to simmer.

For the dye concentrates, I mixed up
1 tsp Procion dye powder with
about 2 cups warm water.
1 put that in a plastic bottle with a tight-fitting cap, so I could shake it up until the dye powder was completely dissolved.

When the water is just ready to simmer, add the dye concentrate and the balls of yarn.
Let them simmer for about 1 hour.

Let cool, then rinse, and dry.  I can't wait to see this knit up!

Lost Wilton's Red Yarn Recovered

 Lost Red Recovered

I thought this yarn was a goner.  I'd dyed it a few months ago multiple times with a mix of Wilton Reds, but instead of a beautiful deep rich burgundy red, it came out rusty orange in color.An unexpected result, to say the least.


I kept trying to figure out what color I could use to over-dye it to not make it brown or black ...


 Sun-faded Wilton's Mixed Reds on wool yarn.
[Before the most recent and final dye bath.]


It's been sitting on the porch most of the summer.  I wanted to point out that the sun will fade yarn dyed with Wilton's icing dyes.   It did fade where the sun hit it the hardest day after day.  That said, I don't usually keep yarned items (socks, mittens, hats, scarves, etc.) in direct sunlight.  So for practical purposes, it's probably all right to keep using Wilton's.


Ta-dah!  Nice recovery!

Last week, I threw the rusty red in the dye pot with another batch of black cherry yarn.  I'd but the loose skein in an old sock to keep it together.  Unfortunately, when I pulled it out, the sock appeared to give it little too much resistance.  At the time, it looked like a lost cause.  Today I was going to wind it into a ball for even more processing, when I decided it actually looked nice in the ball.  So I'm going to keep it as is.  Red and plum.

Much happier now!

Saturday, September 07, 2019

Watercolor Mugs

Watercolor Mugs

I've been wanting to do these Marbled / Water-colored Mugs for a while -- I kept seeing them on Pinterest, and thought it would be a good project with the kids when they came from Japan this summer.  But it didn't quite work out as Ailin never got to our house, and I didn't think Grappa and Gramma would appreciate the mess it would make.

So I did them alone in my basement wet studio where mess is invited and even expected!

They are made with nail polish swirled onto the surface of hot water in a tray wide enough to dip the mug in and pick up the color.  There's a definite technique.  Sometimes the nail polish dried all too fast or got clumpy on the mug.  So it was helpful to have some nail polish remover handy to start over, or touch up some spots.


The blue and green ones turned out pretty well.  The purple and red ones rubbed off when I hand washed them. Live and learn.  It was dollar store nail polish anyway.


I wasn't sure I liked the blue and green ones either, so I let them sit a week, brought them upstairs, and my boys both independently said they liked them.

I did go over these two with a coat of Modge Podge to seal in the polish for a while.

Ok, then -- These mugs into rotation!

Monday, September 02, 2019

Twirling Stars Table Runner Finished

Twirling Stars Table Runner.

Another UFO (unfinished object) finished!

This one is from Quilt Camp a few years ago.   We were told to bring quilting fabric in coordinating colors, so we could use the new tool in our kits that year.  I worked up the top, but never quite got around to finishing it until now.


I added the extra lavender border, because the pattern as it was given ended too close to the swirling tips of the star points.   I think that was the key to getting it done.

It took me a while to work out a quilting plan, too.    Simple diagonals for the squares, and some spiral swirls for the stars.  Not rocket science, but it works!

For my own reference:

 
I'll be giving the ruler and pattern away at Quilt Camp in October, in case anyone is intersted.

On to the next UFO ...