This blog records my experiments and successes with fabric and fibers, surface design, stitching, weaving, photography and whatever else strikes my fancy. Enjoy ...
First attempts at weaving on the little upcycled box loom.
It's working!
All warped up and ready to go!
If you missed the post about building this handy little up-cycled box loom, go there now ... ;-)
For this first shot at weaving on the new converted box loom, I choose
some embroidery floss and black crochet cotton. It's a 7-pattern thread
continuous knot from Susan J. Foulkes' book, Weaving Patterned Bands on p.119. More of a double helix, than a knot, though.
For the colors, I am using black crochet cotton for the background, and green #3 Pearl Cotton for the pattern threads, with a blue accent along the borders. The background threads should be thinner threads, while the pattern threads should be twice as thick to help them pop out more. Since it's only a 2-yard warp, it used up 1 embroidery floss-sized skein of blue (8 yards) and green (16 yards). [I wish I'd taken a photo of that before I started ... The floss was a gift when a friend cleared out her mother-in-law's house. She sent me her stash of embroidery floss.] I only had 1 skein of that lovely green.
I ran a 2-yard warp on the inkle loom. I didn't worry about a cross or keeping the colors in order. This is short enough, I knew it wouldn't get tangled. So I ran the colors in color blocks (as opposed to the exact order they'd be in the threaded warp), and pulled out the needed threads when I threaded the heddle -- with my brand new green glass bead heddle threader. ;-)
I am using the 9-Pattern slot rigid heddle from Harvest Looms in Latvia. Hint: If you're only using 7 of the pattern slots, skip the remaining pattern slots. I threaded them at first, but the pattern didn't work that way when woven, and left some floating selvedges on the sides.. Skip the slots, and use them on the border edges.
I had planned on setting up a starter run, and practicing several of the 5-7-9 patterns out of the Foulkes book, but I also really wanted to get started on the Celtic knots, so I'll save the sampler for later.
Sami Sword Shuttles from HandyWoman on Etsy
Another realization: Equipment makes a huge difference. When you have the right tools for a job, it makes all the difference. I am realizing that the sword-style Sami shuttle would probably make this work go a lot easier. It is designed to pick up those pattern threads. The ones I have now are blunt and short, and don't make it easy to get between. So I put in an order with HandyWoman in Texas. They only took 2 days to get here!
Abbacus-Style Pattern Keeper
I set up a little swiping bead system made with a thrift store picture frame to help me keep track of where I am in the pattern as far as what line/pick and what pattern threads to pull up or push down. The beads mimic the paper pattern above. This simple little system works better for me than trying to do it on paper where I am perpetually losing my place. I'll do a separate post on this handy little invention of mine. ;-)
Here's the set-up for my workstation on the dining room table. Actually it works better to have it sitting on a chair so it's a little lower. I am still using a different style of shuttle -- another one from HandyWoman on Etsy. This one is a slender boat shuttle designed for inkle weaving with a glass bobbin (Oooh!) As mentioned above, it's not quite the right tool for the job, so I'll be happy to switch to the Sami sword-style shuttles above. I just want to finish out the cotton on the bobbin ...
Here you can also see the brilliant little book light / task light my husband contributed to the cause. The dark colors are hard to see in the evenings after I get home from work and the lighting in our house is not great. So the task light is just the thing! It makes a huge difference!
I've had a couple of question about the making of my DIY Vertical Warping Mill from a few years ago. I thought it would be best if my husband, Christian Long, answered the questions in this guest post, since he made it for me.
There are some plans available online that we consulted for the making of it, but did not follow exactly. These are the links I sent to DH as possoble plans and ideas for making a vertical warping mill:
I'm interested in undertaking a project like this. I'm not much of a
woodworker, more of a fixer and rough project doer but interested in
making my own weaving gadgets. Most things I can figure out from the
photos, but am unsure what the pipe goes into at the top and bottom to
support it and to allow for almost silent turning.
The warping mill is in two parts - a stationary base and a rotating upper part.
The base is a piece of plywood with a length of 1/2" (nominal) black pipe attached using a pipe flange.
I cut out a little piece of plastic to serve as the bearing. This is a piece of UHMW, but any smooth plastic will do.
The rotating upper part of the warping mill is made up of two crossed
frames. Each frame is 24 inches wide, and the whole rotating part is 36
inches tall. Each frame has a 7/8" hole in the top and bottom to allow
it to fit over the pipe and to spin freely. 1/2" (nominal) black pipe
has an outside diameter of .84 inches, and a 7/8" spade bit made a hole
around .88 inches in diameter, so it fits nicely while still being loose
enough to rotate freely.
A little wax on the bearing surfaces, and the whole thing moves smoothly.
I've been coveting some of the old antique box looms that use a rigid heddle for making woven tape.
Eleanor Brittle in Hershey, Pennsylvania, with a wonderful collection of old tape looms, and she'll tell you about them all in this 3-part seriesPart 2 Part 3
Rather than buying one (They can be quite expensive ...), I thought there might be a way to make one myself, full well knowing I don't have the skills or tools to make a really nice hand-crafted one. Sigh! Another DIY project ...
I thought the arched tombstone heddle would be tricky to make from a woodworking POV, and didn't want to ask my husband to make this one more item. Making a box out of wood was beyond my skills, and not the way I wanted to spend my limited free time. But I thought there's got to be a way to make one out of an existing wooden box, or drawer ... Often when you see those box looms, the heddle has the silhouette of a tombstone, and doubles as the cover to the box when not in use.
Low and behold, I found this upcycled band weaving loom video by Noreen Crone Findlay. She also has a blog post about this project. I've seen her before, and even built other DIY looms based on her instructions. I love the upcycling and DIY ideas she shares. I thought this was just the thing! I didn't want to make the wooden pall and ratchet, though -- I thought those could easily be purchased as hardware necessities, along with wooden dowels. This video was the inspiration, though as you'll see, we made some of our own modifications ...
Here's an even simpler box loom someone made on Ravelry. I've also seen the Swedish cradle looms that are similar. I think that's more of what Noreen Crone Findlay's Upcycled Band Loom is based on.
Possible candidates:
I've been on the hunt for a suitable wooden box for this project ... It's too early for people to be putting dressers and desks on the curb where I might pick up a suitable desk drawer.
As a Librarian-by-day, I had access to an old card catalog drawer. This seemed like a good possibility, but as the project developed in my mind, it wasn't quite the right shape. The low, long and narrow might work better for card weaving, so the hunt continued ...
Thrift Store Magazine Rack
I went to the local St. Vinny's and found some candidates. This one must have been a magazine rack back in it's hey-day. I thought the tall sides mimicked the shape and feel of those old box looms in the video above, even if I knew I would NOT be cutting the slits in the tombstone sides. As I cleaned it up and examined it further, the short sides are not the same height, and the bottom piece is not square. And there's a noticeable twist to one of the sides. This must have been someone's wood working project -- made by loving hands. It's much nicer than the birdhouse I made in junior high! Good enough for me to take it to the next level with this DIY box loom project.
Looking down into the "box" before any alterations were made.
Here's the list of hardware we had to pick up to make this miraculous transformation:
2 pawl & ratchets
wooden dowels
Hinge
screws
washers
wooden thread spools
drawer pull
We did eventually decide to cut off both of those tall sides, but we re-instated one of them as a fold-down cover and as a way to lift the warp higher so you could work at an angle -- sort of like on the inkle loom. We used a drawer pull to redirect the warp towards the top of the tombstone side. This way, I could take advantage of the wooden box which seemed to be about the right size for this project, but by raising up the weaving work surface, I could also use a wider heddle that would be too big to dip down into the box.
Sleeping / Resting Mode with the tall side folded down for storage.
That side is attached with 2 hinges that allow it to fold over the top of the box as a cover when not in use. But that also necessitated that we find a way to make it stable when it is upright, so my husband designed a simple wood block that stays out of the way of the warp path. This involved some amount of fiddling, since that part of the wood had a marked warped twist in it, that we hadn't noticed earlier. It might have been better to keep the other side? But then again -- most of this box was out of square and uneven. [Next time, my husband says he'll just start by building his own box -- then it would be square and true. Still this gave him a number of challenges and problems to solve--which is good for exercising his brain.]
The beautiful cherry pawls and ratchets: I purchased these from Cranky
Crab wood working shop on Etsy. This was well worth the price to have
someone else make this bit of needed infrastructure. The quicker to get
weaving! I think the dowels my husband chose for the warp and cloth beams are from an old shovel or a broom
handle. Beefy sticks, and recycled, too.
Resting Mode - View from the top.
You can tell the box wasn't square to start with, but my DH made it work.
You can have it warped with a project and fold it down for storage or portability.
It's a nice feature, based on using what we started with to the fullest.
Instead of the wooden spools to lift the breast beam, CL cut out some "feet" to match what was on the bottom of the box. The dowel rests on that, and allows a space for the woven cloth tape to travel back down to the cloth beam in the box below.
Here's the view looking down into the box from the top.
You can see the warp and cloth beams respectively.
Here's the little Tree of Life thingie we attached to the front of it.
Gives it personality and hearkens back to the wood it's made from.
Now to get to the weaving ... which leads to the next question. How to lash on with those shoelaces? I wasn't the only one wondering that, so NCF made a little video to demonstrate.
Here it is all warped up and ready to weave ...
Easy Peasy!
I was going to call this loom the Crone-Findlay Loom, just because I
like the crone part of the name, denoting Wise Woman, but we've made
enough modifications of our own, that I'd have to call it the Modified
Crone Loom, or something .... ;-)
Again, many thanks to my Sweet Husband CL for his help, suggestions, problem-solving and assistance and precious weekend time in transforming this wooden magazine rack into a workable box loom. We make a good team!
I used some"junk" yarn from my stash. It's a chenille in variegated greens.
I still think it was a good choice for a first inkle where I could concentrate on the weaving and rhythm and tension, and the yarn did all the color work.
This is to show how much open fiber was left when I couldn't weave anymore.
I can't really call this loom waste, because it wasn't really wasted-- if you cut in the middle, you can use the remainder for braid or tassled ends. In fact, I was surprised at how little was wasted.
You can also see how much take-up the the up-and-down of weaving takes up. The knob on the left was set in the middle of the slot when I started. By the end of the weaving, it was as far right as it could go.
The most I could get on my inkle loom for warp was 110 inches.
I ended up with an inkle that was XX inches long.
Finished off with tassles.
I tried braiding the ends first, but I much prefer the tassles treatment.
This first inkle was a practice piece.
I knew I would need to work on finding the right tension.
In the photo above, the bit at the top is how things started out -- wide and sloppy.
It's the very same warp, with the same yarn, same number of strings, but by the end, I had it figured out, and things are nice and tidy by the finish. It's considerably narrower, too.
Here they are laid on top of each other, and you can see the overhang at the beginning.
I probably should have taken that out, shortened it and started it further up, but I do see some value in keeping these practice pieces around, if only to show how far I've come -- how much I've learned -- and what NOT to do in future.
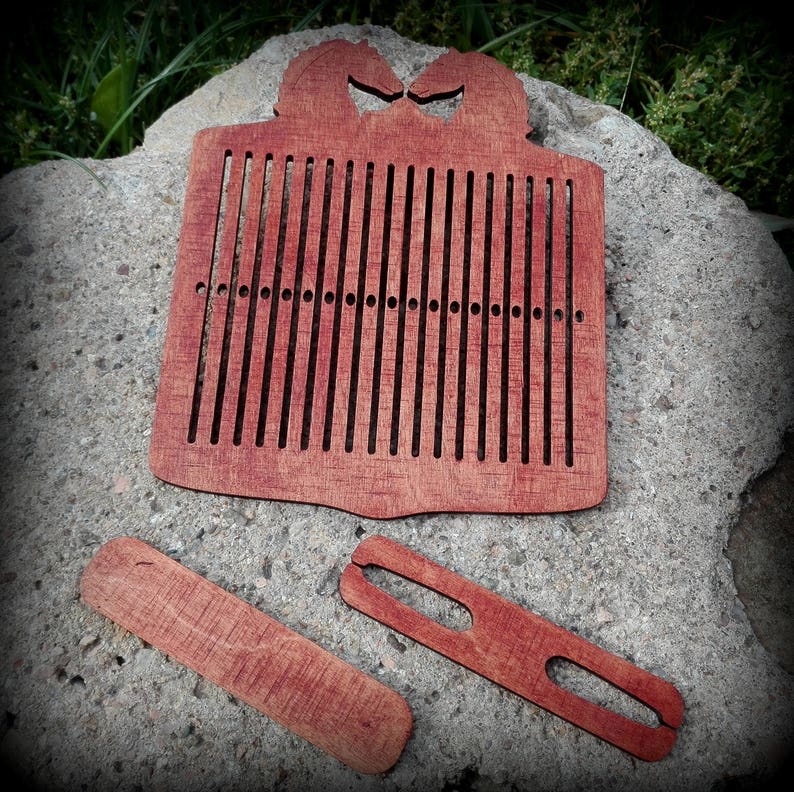
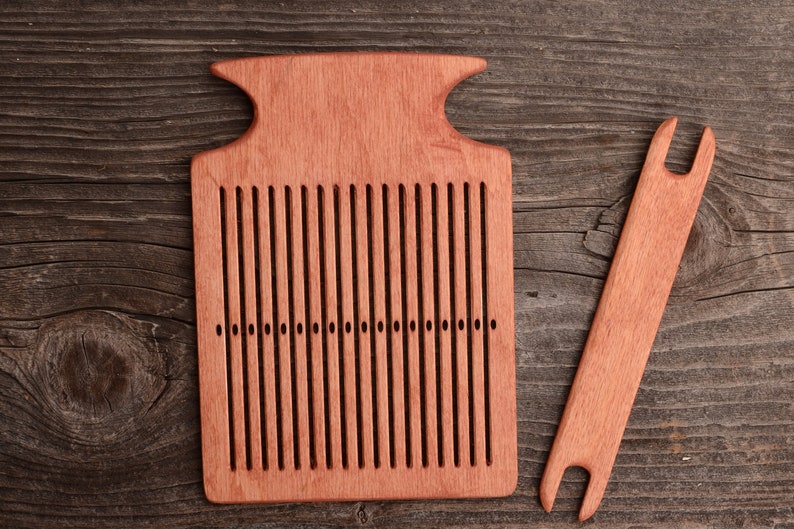
I've recently been fascinated with weaving patterned bands with the assistance of a rigid heddle to separate the pattern threads, making them easier to keep track of ... I did purchase 2 such heddles.
9-Slot Pattern Strings from Harvest Looms in Latvia
and a beautiful Plum Wood Shuttle
This one is from Harvest Looms in Latvia, laser cut from birch wood. It has slots for 9 pattern threads. I thought that would cover me for any pattern I wanted to try from the Weaving Patterned Bands book that focuses on 5-7-9 pattern threads.
Then I realized the pattern I really wanted to try was a Celtic Knot with 13 pattern threads. Hence the need for an additional heddle with more slots for the pattern threads. This time I ordered it from Sweden. It's plastic -- I wasn't crazy about the choice of material, but these are the ones the author uses most. The holes in this one are very small, meaning you have to use thin yarns on this one.
These heddles can be expensive to purchase--I did purchase the 2 above because they have the extra slots for pattern threads. I figured those would be difficult to make myself, requiring more precision than I can muster. I don't have ready access to a laser cutter in a Maker Space, although people have done that, too.
The basic rigid heddles are a little simpler, minus those extra pattern slots. I thought I'd be able to make my own basic rigid heddle with simple holes and slots. There are many options for materials:
Slats from an old broken window blind (Would these be rigid enough? Plastic or bamboo?)
Strings (Technically, not a rigid heddle, but they hold the space for pattern threads). I use these on the inkle loom.
I would encourage you to look around your house (especially the recycling bin) to see what could be transformed into a rigid heddle. You'll discover many "found objects" that could have a whole new life. You might also consider a stroll around the local thrift store (or dollar store) to see what might be easily and cheaply sourced, and otherwise re-purposed for a rigid heddle. This kind of imaginative thinking is half the fun!
DIY Heddle made from Popsicle/Craft Sticks and Paint Stir Sticks
This one actually did work pretty well -- after some amount of cussing from me because the the sticks were sticking to me and not where they were supposed to stay in place with the glue. Eventually I worked it all out, and made a usable wooden heddle this way.
A few notes:
We drilled the holes on the drill press, stacking up multiple sticks to drill them at once.
There were some casualties that split and had to be tossed.
I didn't really have anything I could get into the freshly drilled hole to sand down the rough spots -- Don't want it fraying my warp strings, after all. So I took a nail, wrapped a small bit of wool felt around the head, and heated the nail in a candle flame. Then I rubbed the hot nail in the freshly drilled holes to smooth them down a bit. We'll see if that did the trick, or not.
As previously mentioned, gluing them down was a bit of a challenge. Eventually, I used another popsicle stick as a vertical spacer between the heddles.
Sophie-the-Newfie was our helper in the basement workshop, lending project support as only she knows how.
DIY Semi-Rigid Heddle made from Template Plastic with a scrap wood frame
This one also worked reasonably well.
A few notes:
The plastic was easy to cut to the right length and then cut into strips. I used my rotary cutter (the old one) for quilting on my usual cutting matt.
Although I tried a variety of methods to put the holes in place, the best option was the drill press again. It left the cleanest holes removing the excess material. Other methods, like using an awl to poke through, caused a lot of stress to the plastic, and left a very clumsy unclean hole. It just sort of pushed the plastic aside, but didn't remove anything.
When it came to lining up the strips, I went back to my sewing studio ... I lined up 2 strips of painter's tape on my cutting mat, and lined the strips up in place. The tape held them -- kind of like a stabilizer.
Then I took two strips of bias tape (could have been fabric or ribbon--anything) and stitched through the tape, template plastic and bias tape. Then, I ripped off as much of the tape as I could get off.
Then my husband glued and stapled it between the wooden headers and footers cut to the right size. He added some sides for more stability.
The plastic got a little warped, not melted. I think it will still be ok for my purposes.
I found this plastic "fan" made with a 4-Imprint logo on it. It's plenty rigid and easy to cut. It makes me think "What could I do with the fancier fans that have the slats .--deconstructed?" I haven't tried this one yet -- Not happy with trying to cut the slits from a whole piece of material. But I know it's possible ...
Cardboard Fail: I tried making a rigid heddle
from 2 types of cardboard. One was a thicker-style of non-corrugated
cardboard (like a sturdier cereal box); the other was more like book board.
Both of them were
difficult to cut the slots. Very difficult to get a clean cut with a box knife or other hand-tooled blade, without
it tearing and being otherwise sloppy. It was nearly impossible to poke
the holes through, as it then tore the slits. Eventually, I gave up
and decided THIS is why you purchase a rigid heddle from someone who
knows how to make them and has the equipment. It might have worked on
a much wider, chunkier style of cardboard heddle. Or if I had cut the
slats and treated it more like the template plastic heddle. Or if I had used a power saw to cut the slits ...
Heddle Keeper Box
And here we are back at the beginning. I originally purchased this little apple box at the local St Vinny's with the idea of possibly turning it into a box loom. Eventually, I decided it was the wrong shape (too narrow). But I loved the apples painted on the side. So I've designated it the Heddle Keeper.
Also pictured is a lovely sparkly belt that could be used as a belt for
backstrap weaving (as in the belt would go around my waist to hold tension on
the warp strings hung from a door knob or other stationary point. I found the sparkly belt on the same trip to St Vinny's.
I think this little foray into making my own heddles has sufficiently cured me of wanting to make my own. The purchased ones are of much better quality, and I can afford to support the real artisans who make them. Here are some beauties to consider:
This beauty comes from KalinowayGaj in Poland, via Etsy.
The horses head is one of the classic designs for rigid heddles.
Or this one from by VytuVatu
in Lithuania via Etsy.