Saturday, October 07, 2006

Three Jacks

This was an experiment in trying new techniques.

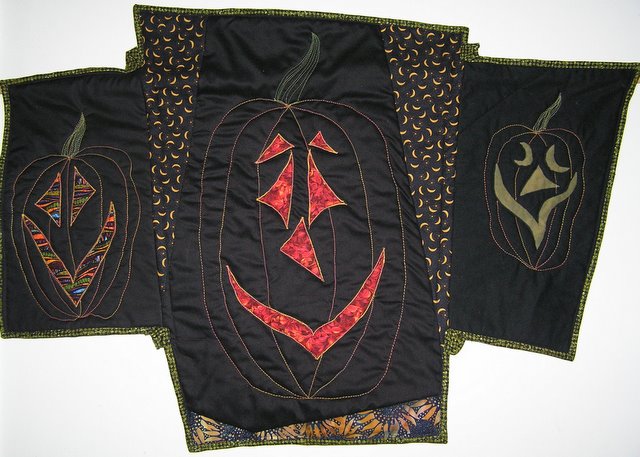
Jack-o-Lanterns are quick and easy subjects!

Reverse Applique (Left & Middle Jacks)
1) The fabrics were layered : black on top, bright underneath(I only used 1 layer in this experiment, but you could use several layers), batting and backing.
2) Vague pattern was drawn on with chalk.
3) Sew around the shapes, and cut away the fabric until you get down to the layer you want to see.
4) Then zig-zag to secure the edges as for applique.

Soft-Scrub with Bleach Discharge (Right Jack)
I made a stencil out of contact paper and painted on the Soft Scrub. After 15 minutes, I rinsed it out. The light parts of the face is the same black fabric discharged of color. It doesn't look like much until you know the technique ...

After the general faces were done, I again chalked out the general outlines of the pumpkin shapes, and threadpained in the lines for the pumpkin and stems.Posted by Picasa

Celebrate!

I had seen journal quilts like this in Chicago, and wondered how thry were done ... Then I stumbled across Quilt University on the Internet. They were offering an online class in it over the summer. I was intrigued : How would an online quilt class work? (Remarkably well, actually!)

We pieced a starry night background. Each starburst/firworks has a bright patch at it's center. Then we thread painted back and forth and back and forth. 1 starburst typically took about 45 minutes to complete.

I used a variety of metallic and embroidery threads (had to buy some new ones to add to my stash, too!)

Tips on working with metallic threads :
1) Sew a little slower. The heat and friction can break these delicate fibers ...
2) Use a metafil needle, or a #14 topstitch needle. These have larger eyes that are easier on the threads.

For the sparkle, we were supposed to add sequins and beads ... I don't have the patience for hand-work, so I went the hot-fix route and used iron-on crystals. It's too bad the sparkle doesn't come through on this photo ... It's better in person!Posted by Picasa

Day at the Lake 2 (2006)

I designed this quilt myself, based on a photograph. Development took the longest time in figuring out how to go from the photo to an applique quilt pattern. (I love my light box!)

There are some great resources out there :
Charlotte Warr Anderson's books (if you can find them)
Marilyn Belter now has a great book on Fabric Portraits as well (though it hadn't been published until after I had this completed).

Another tip on this process : Make your master pattern 8-1/2 x 11 inches. Then it's a very simple, cheap, easy and quick process to take it to a copy shop and have them enlarge it to your desired pattern size (between $2-4) (up to 3 feet).

I used a fusuble web applique method, stitching the edges down with invisible thread. Then I started threadpainting.
* Metalic green thread on the seaweed makes it look like it's wet and glistening in the sun.
* Someone from my art quilt group also suggested using glitter paint to make the sand sparkle. This worked really well on the water, too!

I had originally done this quilt for a show in my hometown this summer. The theme was "On the Lake." At my local Quilt Guild show this fall, this quilt won Viewer's Choice for the Art Quilt Division. This is the first time I've ever won anything at a quilt show! Posted by Picasa

Sebastian Bear at Cranberry Hollow (2004)

This project is a pattern from Bee Creative. I learned the value of color, and light. My quilting teacher at the time (I was also learning to applique) suggested I use silk leaves instead of trying to traditionally applique them all. Hence, the leaves have an added dimension since they are only attatched down the middle. This was also one of the first bindings I did - notice the wave across the top. My bindings have significantly improved since this one. Posted by Picasa 


Bear eating Berries by Amar at Banff Moments.