Saturday, November 11, 2017

7 Days 7 Photos from your Life in Black and White - No Explanations

Day 1
7 days, 7 black and white photos of your life. No humans. No explanations.
I was nominated by my sister, Amanda Yoshida.
Play along if you want to join us ...

This is a meme going around FaceBook these days.  I thought I would compile theme here as a series for future reference.

Day 2

Day 3

Day 4

Day 5

Day 6

Day 7
 

Day 8 (Lagniappe for sticking with me this long)

Sunday, November 05, 2017

Surface Design Possibilities for the Curry & Red Spice Quilt

 Red center; Sepia corners, smaller gold sides.
This one is getting closer to what I'm looking for ...   That gold should be a little more subtle.

I've been playing with layers in PhotoShop trying to visualize the next steps for this quilt.  I decided it wasn't ready as is for quilting yet.  It was a nice background for some additional work. 

My friend Sheila at Idaho Beauty reminded me of Cynthia St. Charles surface design work where she adds stamping and block prints to her quilts--to an amazing and wonderful effect!  Sheila counseled against the Shiva Paint Sticks as I'd probably want to wash this one day.  So I'm leaning towards dry-brushing with fabric paints.

I'm still trying to settle on the right colors ... burgundy and a forest green?  Translucent graphite?
I want these add-on colors / layers to be see-through, where the colors of the fabric beneath show through. It's meant to add an extra dimension, and to tie everything together.

 A few people suggested using white for the stencil design.  
I'm not crazy about this one, so it was good to trial it.
It really makes the background pieced quilt look washed out and pale.

This was one of the first combinations I tried -- Red with gold in the corners.
Not bad ... but not quite right either.

It will take a while to develop the right technique, so best not to start with the center mandala!

I need to do some measurements, too.  The stencil is supposed to be 23 inches across-- which sounds pretty big, until you think about covering a bed-size quilt.  That can fill in the center middle, and corners in quarters.  But what do I do with the spaces in between?


Somewhere I have a metal trivet that I purchased for rust dying.  But it's also been wonderful for stamping with acrylic paint.  I did some experiments with that years ago on a baby-shit brown piece of dyed fabric that I thought should have been destined for the trash.  Turns out that unappealing ocher color turned out to be a good neutral background for the stamped prints.  And the colors actually make it look like they are floating in 3D -- like ornaments hanging in the air.


Saturday, November 04, 2017

What would you do?

Here's where I wish I still had my old Art Quilt Group to bounce ideas onto.  
I am in need of an art consult ...  What would you do? [Sheila at Idaho Beauty-- I know you'll have some suggestions!]

I was going to sandwich this quilt top at Quilt Camp in a few weeks, but I'm feeling like it needs more work (surface design) before it goes under the needle ...

 This is the Curry and Red Spice Quilt Top. 

Can you picture it with the following mandala stencil on it?  It's supposed to be 23 inches wide.
The next question is : What medium?  Some kind of transparent paint? What color?


I've been toying with the idea of putting a crane on it in silhouette as I did here :
This was a small journal quilt, and I don't think a bigger-than-life crane will work very well on a bed-size quilt.  It would be monstrous.  And the paint I used here was too opaque, I think.   
Maybe Dyna-Flow or even those oil crayons we had to buy when they were hot ...  But what color?

Wednesday, November 01, 2017

Alpaca 2-Ply Yarn Spun from Sabamba Roving


Altogether, I got these 4 balls of 2-ply yarn.
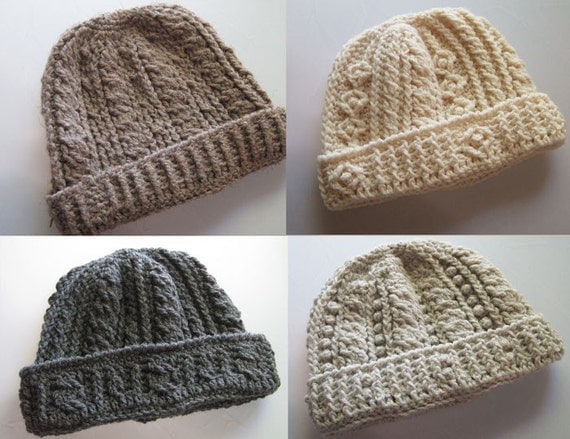
I'm going to try to crochet one of these "Rugged Mountain Hats:"

Looks like kind of a complicated pattern, so we'll see how far I get ...

This is the tag that accompanied my bag of roving from Sabamba last year.  
It helps me remember where the fiber came from, and how much ...

Monday, October 30, 2017

Progress on The Loon Lake Quilt

Detail Lark and Iris

At Quilt Camp in October, I made some progress on The Loon Lake Quilt.  I think this one is going to take me a good 25 years before I actually get it all finished!

Detail Lark with Thread-painting.


 Detail Irises

Detail Iris

 Detail Iris

 
Here's the whole block in context.
This includes the new color choices for some of the grasses.

 Here's a shot of the back of the Larks and Irises block.  You can see from this side just how much stitching I did that weekend--especially on the lower lark.    Some of it was just the applique to make sure everything stays stitched down.  The rest was the thread-painting.

 The amended loons now have striped necks.    Much better!
I didn't do much thread-painting on the loons because it just wouldn't be seen.
Rest assured that the pieces are sufficiently appliqued down.

 
I bought this as a kit with the pattern and fabrics in 2007 (or so).  I think one of the reasons I've been so slow to finish it is that I just have not been happy with some of the fabric choices that were included in the kit.  Hence, my reluctance to commit and actually finish it. 

This time, I "fixed" the loon blocks.  I wanted to see stripes on their necks, but that's not what was included in the kit.  It came with this speckled fabric ---  All this time, I've been trying to figure out what's not quite working on this quilt, and why I can't quite finish it ... This was a major sticking point for me.  But I'm working through it!

Here's the BEFORE picture of the loon and the previous choice for grasses.
Don't you like the neck stripes better on the shot further up?  I do!

I also sapped out some of the grasses in the irises and larks block.  Some of that was my fault -- I substituted something from my own stash that didn't quite work here.

After I got home and put it back up on the design wall, I realized I had not appliqued the landscape in the background.  I'll have to go back and finish that part some day.  Not a big deal--I just need to commit!

See the other Loon Lake posts here, tracking my progress with this quilt.

Sunday, October 29, 2017

Mande's Blue & Orange Star Quilt on the Design Wall

 Mande's Blue and Orange Star Quilt on the Design Wall

At quilt camp earlier in October, I had enough blocks ready to layout the star pattern for Mande's Blue and Orange Star quilt. I was pleasantly surprised!  It was helpful to lay it out, and have the Quilt Ladies take a gander.  These women are trained to look at quilt blocks., and layouts.  If something is out of place, they'll catch it!  One of them told me about one of the orange blocks that should be turned another direction.  When I finally saw it, she was right!  Do you see it in the photo above?

Last week, I squared up the blocks.  This wkd, I laid them out again at home.  I've been swapping out some blocks for others, moving them around for the best layout.   I have to let this sit for a while longer, before I start sewing them together.

Mande's Blue and Orange Star Quilt on the Design Wall at home
Getting closer to the final layout.

Sometimes it helps to take a picture.  If you see it on a small screen, you can literally get enough distance to "see the forest for the trees."  Suddenly, it gels, and you can see the whole picture--it becomes a quilt top--something whole unto itself, and not just the individual blocks.  

Blue Alpaca Woven Shawl

Blue Alpaca Woven Shawl

It's finally cold enough to where I wanted something a little extra to keep me warm.  This was just the thing today!


I wove this up last winter with Janet's Favorite Twill.  It was really meant to be an experiment -- The first warp on the "new-to-me" Kessenich 4-shaft floor loom.

The alpaca yarn was given to me by someone at work after she retired.  I think she'd gotten it from an Aunt of hers who had passed away.  I think she heard me complaining about the cheap scratchy acrylic yarns the craft ladies were using as not being something I wanted to work with for weaving.  Her ears perked up, and she knew I would appreciate "the good stuff."  Thank you, Nancy Schmidt.  This is wonderful yarn!

 Detail of the closure / clasp.  This pin is from Scotland.
Here you can really see the warp strings, too.  I used a maroon cotton, as we were setting up to do rugs last fall.  It looks a little "rough" and rustic here, but I do like the effect.  

Next time, I will use a natural colored wool carpet warp with similar alpaca yarn in browns.  That should blend in better.   


I came across this picture from last winter when it was still on the loom.  I had forgotten how well this particular style of shuttle worked so very well for weaving this cloth, as I was able to get almost a whole skein of yarn on the shuttle.


Detail of the weave structure : Janet's Favorite Twill


Detail of the binding on one end.    Very clean and tidy.
This worked really well, and would also work for hemming rugs.

On the other end, I tied off the warp strings and left them hanging long.  When I did the wet-finishing, I probably went too far -- but then this was all experimental, remember?  The end with the loose warp strings hanging off as fringe worked really well to felt that end of the shawl--the strings were beating the fabric into submission.  It's a really nice thick felt on that end! 

I will probably trim off the strings, and bind them under a black ribbon, to make it more like the other side.  

As a result the felted end is much shorter than the other end, that didn't get the extra massage work.
Here' you can see the difference in the widths end for end.  It also shows the difference in the felting and not so felted.

A note about the weave structure (for future reference, when I want to recreate what Ive done here) :

 
Treadling Notes for Janet's Favorite Twill
I had to do some adapting to make it work with the straight draw set-up on my loom.
Straight Draw means, basically, that the warp strings run conscutively through the heddles of each of 4 shafts.  
Shaft 1 Heddle 1 String 1
Shaft 2 Heddle 1 String 2
Shaft 3 Heddle 1 String 3
Shaft 4 Heddle 1 String 4

Repeat for subsequent sets :
Shaft 1 Heddle 2 String 5
Shaft 2 Heddle 2 String 6
Shaft 3 Heddle 2 String 7
Shaft 4 Heddle 2 String 8 

I also have my treadles set up in a "walking" configuration. This means that :
Treadle 1 lifts Shaft (1+3)
Treadle 2 lifts Shaft 1
Treadle 3 lifts Shaft 2
Treadle 4 Lifts Shaft 3
Treadle 5 lifts Shaft 4
Treadle 6 lifts Shafts (2+4)

Basically, the outside peddles allow you to do a common weave with every other string up or down--It's like you'd be walking, alternating the outside treadles to make common cloth.  Pedal 1 lifts Shafts 1 + 3 at the same time.  Pedal 6 lifts shafts 2 + 4 at the same time.

The 4 treadles in the middle lift each of the 4 shafts individually.  I tend to think of these as a set all on their own : 1-2-3-4 (rather than treadles 2-3-4-5 out of 6 total.)

Depending on how you combine the treadles, you have quite a variety of weaving patterns available.  The treadle pattern listed on the cards above makes up Janet's Favorite Twill.


For me, it was easier to write the card to read from th bottom up, as that tracked how the cloth was woven in front of me.   It was also easier to think of each line as a pass of the shuttle through the open strings. 

1st pass :  Treadles 1 + 2 which lift shafts 1 + 2 (actually treadles 2 + 3)
2nd pass : Treadle 6 (2 + 4) which lifts shafts 2 + 4
3rd pass : Treadles 2 + 3  which lifts shafts 2 + 3 (actually treadles 3 + 4)
4th pass : Treadle 1(1+3) which lifts shafts 1 + 3
5th pass : Treadles  3 + 4 which lifts shafts 3 + 4 (actually treadles 4 + 5)
6th pass : Treadle 6 (2 + 4) which lifts shafts 2 + 4
7th pass : Treadles 1 + 4  which lift shafts 1 + 4  (actually treadles 2 + 5)

When I was weaving, I used a bead system to help me keep track of where I was in the treadling pattern.   I was amazed at how brilliantly this weaving hack worked to keep me on track, and prevent loosing my place!

Who's Janet?  Janet Dawson teaches the Floor Loom Weaving online class at Craftsy, where she shares no less than 37 weaving draft patterns, of which this #13. 


Cozy & warm!

Saturday, October 28, 2017

Missives from Quilt Camp Oct 2017

My big project for the weekend was to finish up the quilt blocks for Mande's Blue and Orange Star Quilt.  I was able to borrow someoen's design wall to see how it would look.  This needs 1 more row across the top and along one side ... 

 Donna (one of my table partner's from years past) was also working on a similar strippy star quilt.  Same technique, but different.
Really neat to see how each of our Stars turned out!

The other big project I was working on was to chip away at the Loon Lake Quilt, so I spend some time thread-painting the birds and irises.

 Me with my table partner,  Laura Ramseier.  October 2017.
I swear : We did not coordinate our outfits before hand!

Laura's box of scraps.  All these were cut to the same size to make it easy to use for the same project.  Laura sorted them by color/pattern/fabric, as she needed multiples to complete a single block.  
I am still in awe of how Laura makes her quilting magic.  Her scrap quilts are gorgeous!

I've been thinking I need to start getting a handle on my own scraps ...  some day!

 
Since this was the 10th anniversary of Quilting Friends Quilt Retreat, we all brought chicken-themed gifts to honor Laura Ramseier, our host and organizer.  This amazing wool appliqued wall hanging was made by Jolene Stadtler and Ruth Mathwig.

 
Here's the whole gang : Quilting Friends
October 2017 at Lake Lucerne in Neshkoro, WI