The Lesson this week was to take 1 photo and work it up 3 different ways.
 |
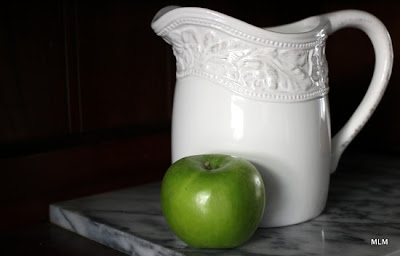
| PSE Version 1 |
|
|
|
|
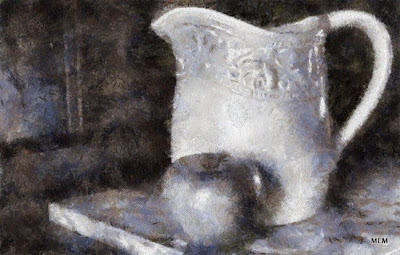 |
| AutoPainter iPad App - Benson Treatment |
|
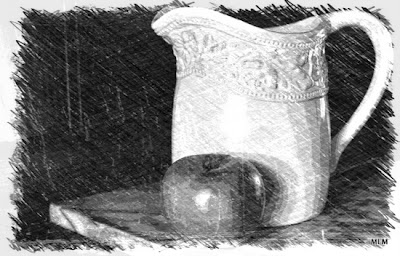 |
| PhotoStudioHD iPad App - Charcoal Sketch |
|
|
 |
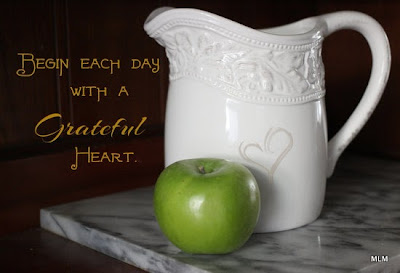
| Original Photo from The Apple Sessions |
Although I really like this picture from the Apple Sessions a few weeks ago, it has some challenges. The background is so dark, it's difficult to add textures, so I did the basic PSE treatment of adding text and a heart brush. I thought this would be a good time to play with some of the many iPad photo apps I've collected in recent months. First, I did some basic edits in SnapSeed (Added Drama1 and a Black-and-White Neutral treatment) before pulling it into AutoPainter and PhotoStudioHD respectively. It's kind of fun to see the transformations. And gratifying to see the effects of paint and drawing without having to actually invest in expensive art supplies and actually learn the techniques. ;-)
 |
| Kim Klassen's Spring Blossom Pic with Romantic Recipe 1 in LightRoom 5 |
 |
| Kim Klassen's Spring Blossom Pic with Hazy Sun Recipe 2 in LightRoom5 |
 |
| Kim Klassen's Spring Blossom Pic with Recipe 3 Edits in PSE |
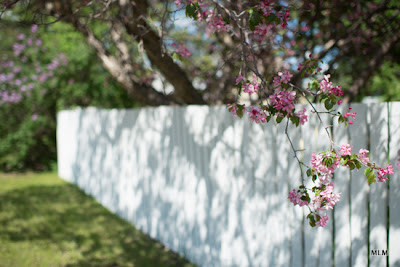 |
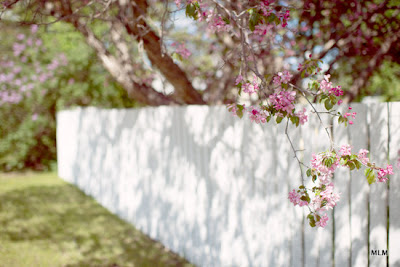
| Original Spring Blossoms Photo Sample Pic by Kim Klassen |
I actually started the lesson with Kim's sample pics and the recipes. This lesson did not go well for me. Lots of frustrations with LightRoom. Sigh! This is a new program for me. For years, I've been using Picassa to manage and organize my digital photo collections. It's been working out just fine, but with all the talk about how wonderful LR is, I decided to make the switch. I've been using the beta version of LR5 for a few months, and finally purchased a copy in June when it was officially released. Thought I'd better sign up for Kim's
Round Trip class so I'd actually learn to use it, practically speaking. I'm through the first week (1 of 8) of lessons with 17 pages of notes and at least 10 hours of time invested so far. She packs it full of information! That was just week one --- There are things I know how to do in my sleep in Picassa. I don't even have to think about it. Not so in LR. I should be easier on myself--it's a brand new program for me, with another Adobe (not-the-most-intuitive) learning curve. PSE was difficult in the beginning, too.
So I figured out how to make a virtual copy of Kim's sample spring blossom image, and worked through her 2 recipes. 1 thing that threw me for a loop was the White Balance Preset. Kim likes to use a "cloudy" white balance preset. The only options I saw in the LightRoom Basic Panel were "As Shot, Auto, and Custom," so I'm not all all sure if that's just a variation between LR4 and LR5 or if I'm really missing something? I don't know enough about LR or all those settings to make my own Cloudy Preset.
Also having trouble with those Tone Curves. I can't figure out how to grab onto the endpoint and move them up or down the graph. Whatever I select just moves the curve, but the end points remain corner to corner. ??? Anyone know the trick to adjusting those?
So I had my version 2 and 3 done. LR decided to "stack" them. I guess that means LR recognized they were all related and made a mini-collection on the fly.
The virtual Copies were in a stack : Kim's original sample pic, along with the 2 Light Room tweaked versions. At some point, I wanted to make another copy so I could try Recipe 3 in PhotoShop Elements. That seemed to work -- The Elements Recipe was so straightforward and simple, it only took about 2 minutes! Then I went back to LR to look at all 4 versions and compare. And the first 2 LR versions were nowhere to be found! Ugh!
I'm still not at all used to the organization system. In Picassa / PSE, I like to name the files and add captions so I can easily tell what assignment and what version. I guess I can do that with keywords in LR, but that seemed to get lost -- Kind of a pain to flip to the keyword window just to see which was which. Then it looked like I had 2 extra plain copies of Kim's original sample pics sitting there, so I deleted them. Turns out, I must have deleted the whole stack. Grrrr --- I hope Kim has a lesson on this Stacks Phenomenon. Breathe! You can do it all again ... It will stick this time, right?
So by the time I re-did everything, I decided to make my copies of Kim's original in Picassa then make the LR edits. I thought that method would be clearer in my head. And it was -- but now I have multiple images with multiple edits in 2 different catalogs. Picassa can't see the LR edits, so some of those pics look like plain old copies of the originals. Are you confused yet?


1 comment:
Hi Michelle! You poor thing! I just read your post...sounds like you are in over your head with Lightroom. I will say...it is a very different "beast" than your Picassa and I used to use Photoscape that was a free program. LR is huge compared to these two tools. Please continue to persevere ... it is sooo worth it.
One answer to the question about the basic panel. If you shoot in jpeg format you will only have As Shot, Auto or Custom to choose from, but if you shoot in RAW you will have all of the WB settings available in LR to make the adjustment - which is where the Cloudy version came from that Kim used.
I will send you an email through Flickr.
I LOVE your versions on the apple shoot!!
Post a Comment