Finding Fences, Revisited
For today's lesson, Kim offered a recipe to try on one of her own images. This was very helpful as I've been frustrated with having the recipe not work very well on my own images. (User error, or just not picking an appropriate image? Probably some of both.) This exercise removed some of the variables, and I was able to get her same results. Hurray!
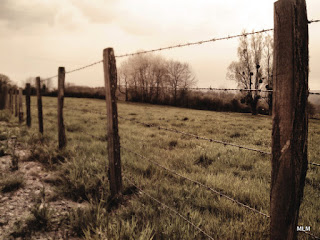
Here's my original Finding Fences photo from last week. I decided to try Kim's recipe on it for this lesson.
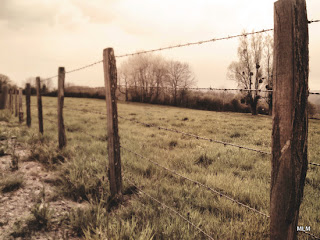
This is what I got. The greens are still a little too dominant for the desired effect, so ...

on Layer 7, I changed the Blend mode to Soft Light. That toned down the greens. But it still looked a little dark, so ... one more adjustment :

I added a little fill light in Picassa. Now you can see the grain and textures in that first fence post.
Here's the Photo Processing step-by-step :
(This is more for my own records than anything else. Unless you are familiar with PhotoShop Elements, this probably won't make any sense.)
Layer 1 : Original Image as Background
Layer 2 : Add Adjustment Layer - Gradient Map >BtoW ; Normal blend mode 100%
Layer 3 : Duplicate Layer 2 ; Screen Blend Mode 30%
Layer 4 : Duplicate Layer 2 again ; Soft Light at 25%
Layer 5 : Add Adjustment Layer > Photo Filter >Warming Filter 81 at 55% ; Normal blend mode 50%
Layer 6 : Add Adjustment Layer > Choose a vanilla shade ; Soft Light at 30%
Layer 7 : Go back to the background layer at bottom of stack and Duplicate this layer. Drag it to the top of the stack. Lower Opacity to 35%
Layer 8 : Add Kim Klassen's Pumpkin Grunge Texture with Soft Light blend mode
Layer 9 : Add Adjustment Layer > Levels 28-.80-255 ; Opacity at 50%
Wait--there's more! This lesson was about The Blur, after all ...
At this point, I could have flattened the whole thing, and started a new process using the Blur effects.
Layer 1 : Background image
Layer 2 : Duplicate background image
Filter > Blur > Gausian Blur at 8.9 pixels +Layer Mask
Choose Gradient Tool Black > White
Mask off some of the blur. Follow the fence line from near to far (or about half-way).
Lower the opacity to soften the effect.
Thanks, Kim. This was a neat and useful lesson!
Thanks, Kim. This was a neat and useful lesson!


No comments:
Post a Comment